 |
|
| Manufacturers | |
| BV
List |
|
| BV 40 | BV 141 |
| BV 155 | BV 237 |
| BV P163 | BV P170 |
| BV P178 | BV P179 |
| BV P184 | BV P188 |
| BV P192 | BV P193 |
| BV P194 | BV P196 |
| BV P197 | BV P198 |
| BV P202 | BV P203 |
| BV P204 | BV P205 |
| BV P207 | BV P208 |
| BV P209 | BV P210 |
| BV P211 | BV P212 |
| BV P213 | BV P215 |
| BV AE607 | BV MGRP |
| Home | |
Czechmaster - Resin - $40ish Aud
William Moore


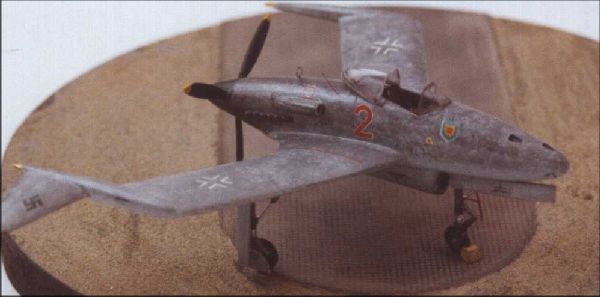
B &V P 208.03
Czechmaster - Resin 1/72
Graham Causer
The P-47 and P-51 pilots were returning to base with wild stories of their friends being despatched from the skies by strange German aircraft – 'Back to Front' fighters, even flying discs! In reality the ever more desperate Luftwaffe was simply utilising all their available assets to play the Americans at their own game…..
Messerschmitt 262's of KG 51 were flying daylight bombing sorties against the ever advancing Allies and were only vulnerable to attack when they were in the landing 'pattern' at their home bases – autobahns and forest hides. As the 262's landed they were 'bounced' by the Americans and shot to the ground. With the inevitable conclusion to WW II just around the corner the redundant test pilots from Blohm & Voss flew their handful of development P.208's to join KG 51. The plan was simple – the P.208's would take off prior to the expected arrival of the 262's and would loiter at altitude in the vicinity of the landing site awaiting the arrival of the American fighters. The Americans were fully occupied with the anticipated destruction of the 262's and never saw, or expected to see, any 'top cover' and thus THEIR fate was sealed! Any pilots that did escape could drink the evenings away for free in their bars on the strength of their tales of fleeting glimpses of 'back to front' fighters and 'flying discs'………
The B&V crews spent their periods of inactivity, concealed in their woodland hides, by painting their steeds in the flying colours of their adopted unit Kampfgescwader 51 'Edelweis', maintaining these aircraft with the minimum of spares & materials on hand and wondering what other secret, prototype and development aircraft were being used to the same end ……. Flying discs – who knows?
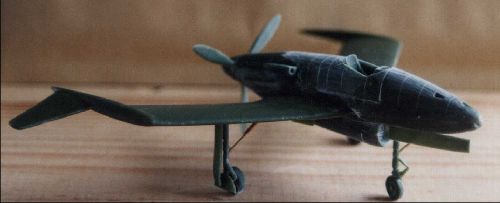
THE MODEL.
I counted 29 parts to this resin kit. It is one of those aircraft the just cannot be resisted – see it and fall in love with it! The hard work is already done as the main fuselage is cast in one piece and only the cockpit 'bathtub' area has to be fitted. Careful separation and cleaning up of all components now will be rewarded at the painting stage. I used liquid 'superglue' and Milliput filler in the construction of this one – a little filler being required at the 'bathtub' join, for a small hole in the resin around the nose area and at the radiator joint. I replaced the 'locking' oleo's for the wheel legs with my own which were manufactured from small gauge copper tube and brass rod, (obtained from a local radio control model plane, car & boat shop). The rod being inserted and glued into the tube. The mainwheel to oleo stub axle is non-existent and this too utilised the copper tube – I drilled out the wheel centre and inserted the tube to form an axle which was superglued to the oleo. There are no supplied assembly instructions but the 'exploded' diagram is more than adequate as a construction guide and all other kit components were used. I drilled out the engine air filter/intake to make it look more authentic and elected to open the canopy and add some detail to the cockpit. It was apparent that the pusher prop would strike the ground on take-off and so I removed just a small section from the nose wheel leg and the problem was solved! All wheels were lightly sanded where they contacted the ground to represent the down force weight of a real aircraft on its tyres. When I 'modded' the nosewheel I took the opportunity to re-align the wheel to represent a stearable unit.
I decided the canopy would be a rear sliding assembly, placed the separated rear half on a piece of plasticard, drew round it and cut out its shape on the plastic. This section was then refined, with file and knife, to be the new rear canopy half base frame and mounting. The rear canopy moulding was fixed to it with Humbrol 'Clear Fix', a fillet/guide added from plasticard and I had an acceptable canopy. The interior was treated to side consoles, instrument panel and seat straps by Airwaves, suitably modded, from a Me 262 set. The same set provided the 'loop' aerial.
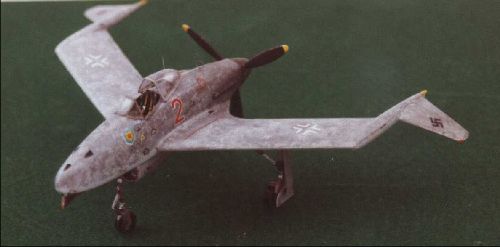
This kit was built over two evenings whilst I was away from home on a holiday – I didn't have the luxury of an airbrush and so hand painted the whole model with matt white to form an undercoat and a good base to check for imperfections in the casting and my joints. A few adjustments here and there, a light rubbing, (more a wipe), with wet n dry, (used wet), and I was ready for my camo choice. The whole thing was painted in Xtracolor thinned with white spirit. All over in RLM76 and a mottle of RLM 74 over the upper fuselage that blended into a mottle of RLM 75 towards the outer wing areas against the RLM76. I used a very thin wash of matt black to represent stained areas around the engine panels. My wheel bay interiors are white with light green door inner panels. The cockpit interior is grey and seat belts brown. The buckles are picked out in silver as are parts of the undercarriage oleo's. I decided to leave the consoles and instrument panel in brass and just washed it over in thinned down black to highlight detail. The whole aircraft was 'drybrushed' in matt white and then matt black – VERY LIGHTLY – to highlight panel detail. The wingtip lights were painted in and glazed with kristal kleer. My decals came from a Hasegawa Me 262 and an old sheet that was free with a magazine. The final touch was a coat of satin varnish, canopy held in place with clear fix, and a heat stretched sprue aerial fixed with the smallest drop of superglue.
Because of the nature of the resin cast, (main fuselage in
one
lump), this would be an ideal introduction to resin models. The
completed model will give a newcomer to resin the encouragement to
venture further onto some of the more complex kits. I was delighted
with my end product – but more to the point, I really enjoyed building
it!
 |
 |
 |
 |
 |