 |
| Manufacturers |
| He List |
| He P 1073 |
| He P 1077 |
| He P 1078 |
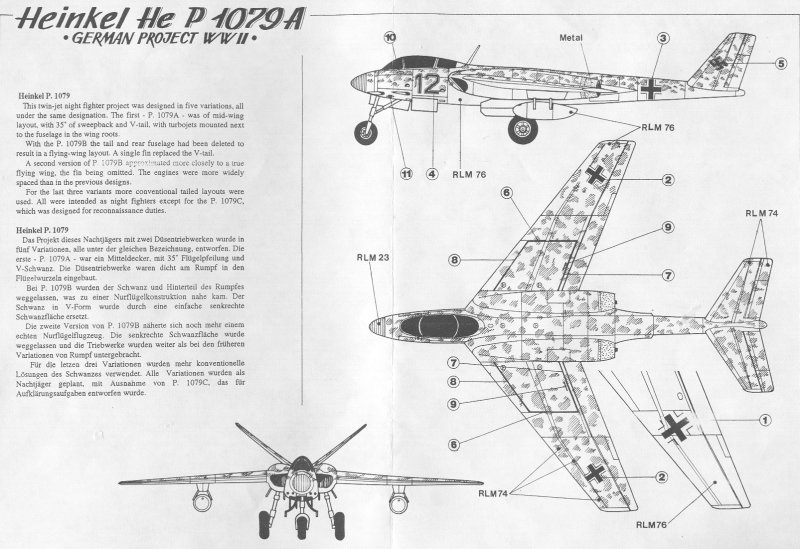
| He P 1079 |
| He P 1080 |
| He Wespe |
| Home |
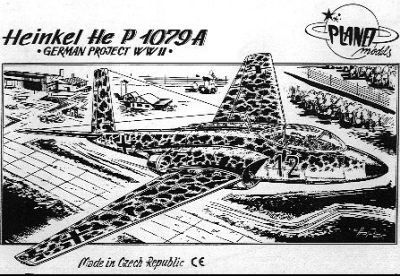
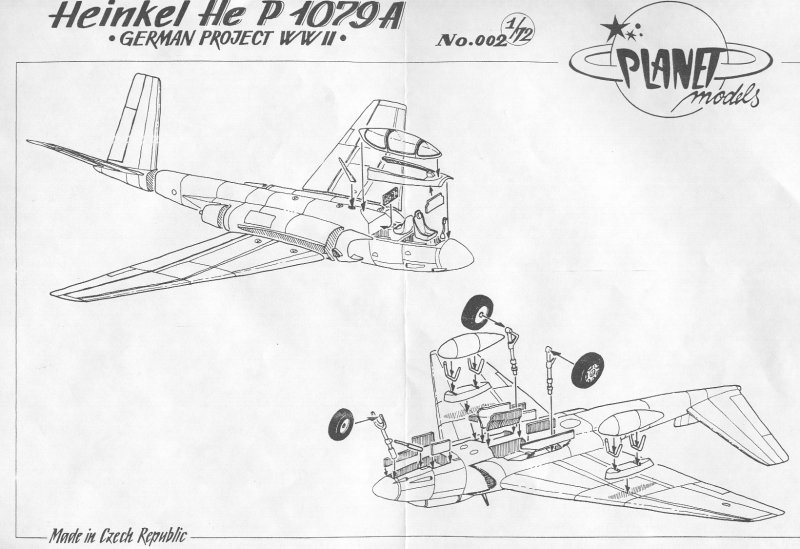
Heinkel P.1079A - Planet Models - Resin
Richard Franks, SAMI article
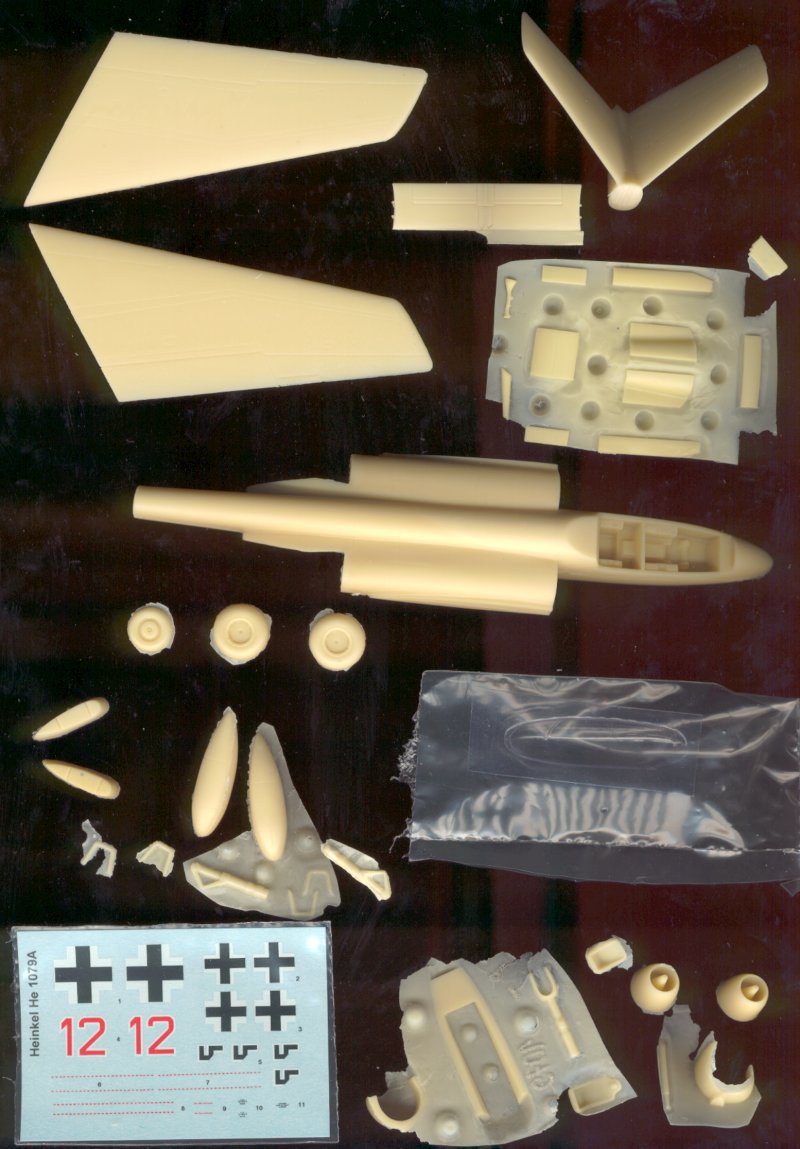
The He 1079A was to be a 2 seat night fighter. The usual good cockpit detail is supplied but the drop tank sway braces are too large and should be replaced or discarded - again another tricycle u/c nose sitter unless some work done.
 |
 |
 |
Karl Juelch
 |
 |
 |
 |
 |
 |
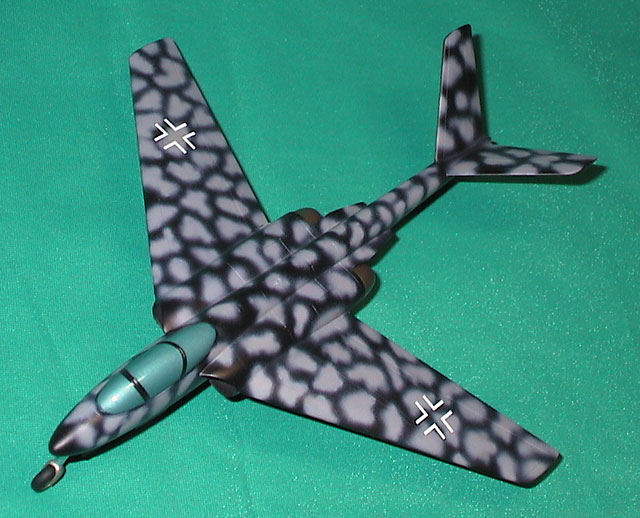
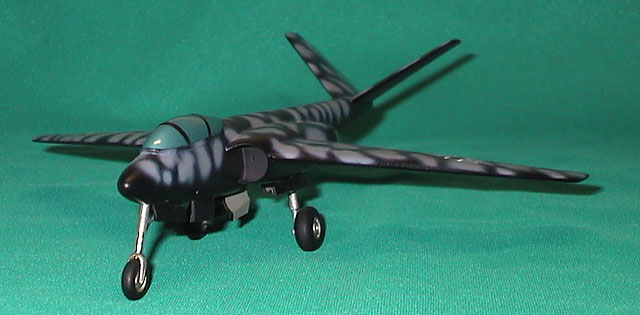
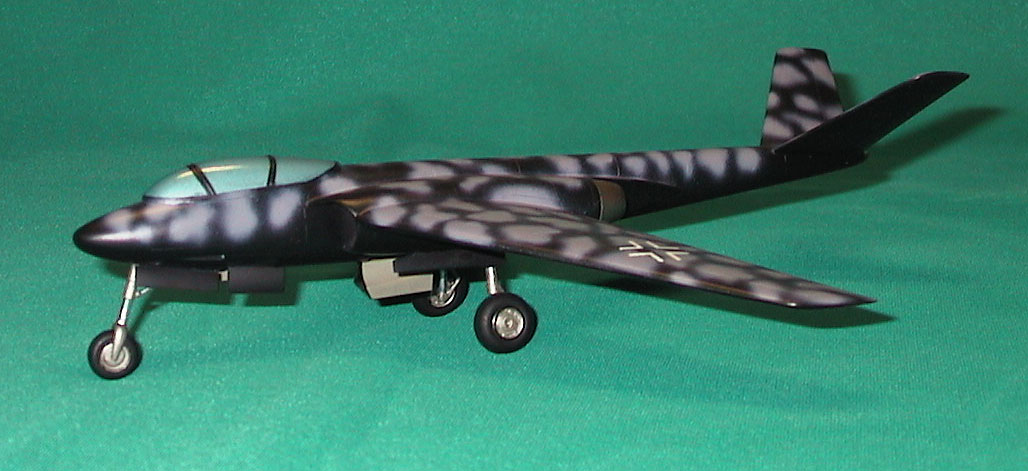
I built this model many years ago, so providing a detailed, "blow by blow" description of the building and finishing process will not be possible. What follows is a quick synopsis of what I can remember.
This superb resin kit could serve as an ideal introduction to the medium if you have never built a resin kit before. The castings are of the highest quality, with few if any "pinholes" and delicate engraved panel line detail. All the parts fit together well with little putty needed.
After carefully cleaning the thin flash off most of the pieces, I carefully drilled out as much of the butterfly tail and aft fuselage as I dared to help prevent this model from becoming a tail sitter. As it was, I still needed to add weight, and the easiest place to put that weight was in the cockpit. Fortunately, it is my custom to build "paper project" aircraft (as opposed to airplanes which actually existed) in the style of solid "desktop" models--in other words, I overpaint the canopy. When displayed with the rest of my collection, this helps set the model apart from models of "real" airplanes, and serves as a visual clue that this particular aircraft only existed as a "paper project". If one were to finish this kit with a clear canopy, I would recommend hollowing out as much of the resin aft of the main landing gears as possible, because it will be a challenge to find enough room for weight needed to keep this model on its nose gear.
The kit assembled very easily with superglue and a bare minimum of puttying and sanding. I was afraid the weight of the model would cause the resin LG struts to sag, so I reinforced them with brass wire. The finished model has been sitting in my collection for about 8 years now with no sagging evident anywhere. I elected to leave the drop tanks off to accentuate the clean lines of this aircraft.
I chose a hypothetical paint scheme of overall black with splotches of RLM 74. The kit decals were used and they performed well with just a little setting solution needed. The decal sheet includes hypothetical unit markings, and once again my personal habits influenced the way I finished this model. When building "paper project" aircraft, I limit the decals to just national markings--this gives the model a "generic" look which helps set it apart from the rest of the models in my collection. Again, this is just something I do out of my own personal preference.
In conclusion, this is a very well engineered and produced kit which goes together with a minimum of fuss. If you find one for sale, or already have one in your "stash", grab it and build it!
Karl Juelch
Czech Master - 1/72
Fred Bultman
One of Heinkel's late war fighter designs, the 1079B was the second of three versions of this project, all of which are available in resin. The following is from Dan Johnson's Luft '46 WebPages:
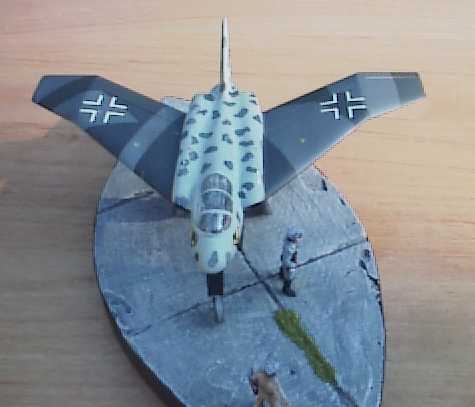
The second design of the He P.1079 was closer to a flying wing layout, although there was a single, vertical fin that replaced the V-tail of the P.1079A. The wings were gull-shaped and were swept back at 45 degrees. This version of the P.1079B all-weather heavy fighter project was to be a single seater. Like the P.1079A, the two HeS 011 turbojets were located in the wing roots and the armament was four Mk 108 30mm Cannon.
Wingspan: 42'8" Length: 29' 6" Maximum Speed: 630 MPH
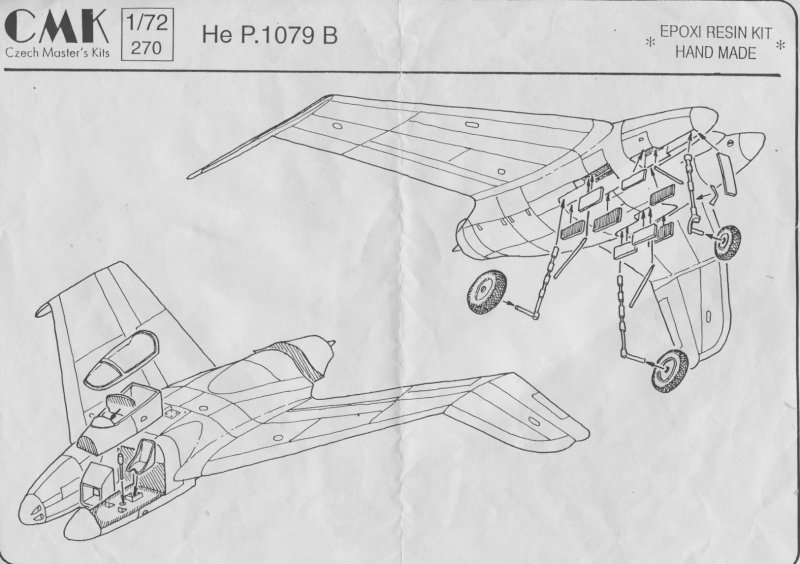
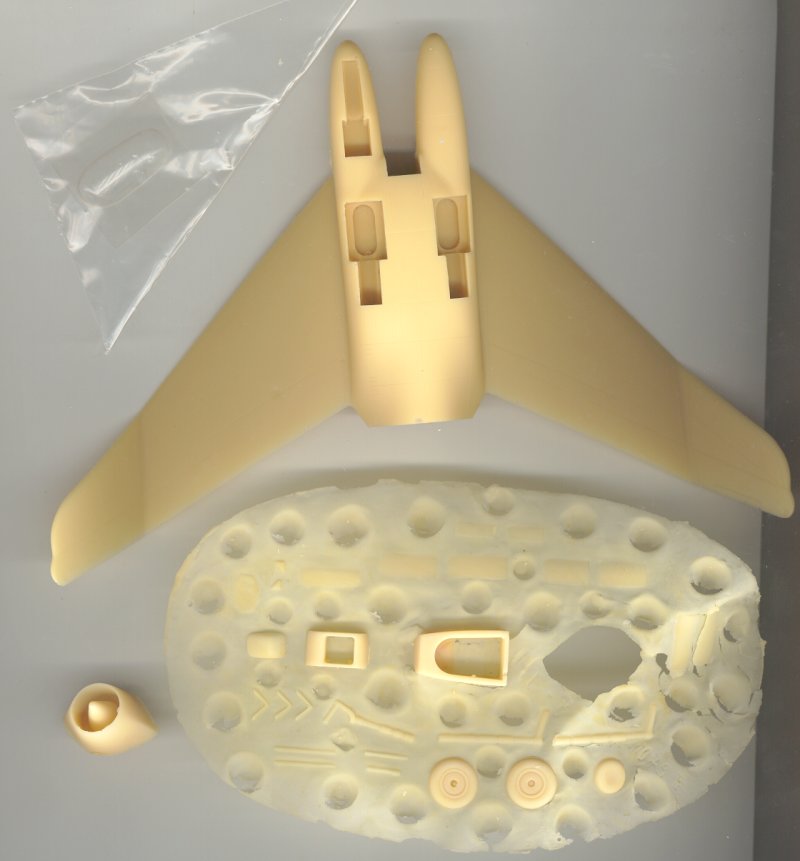
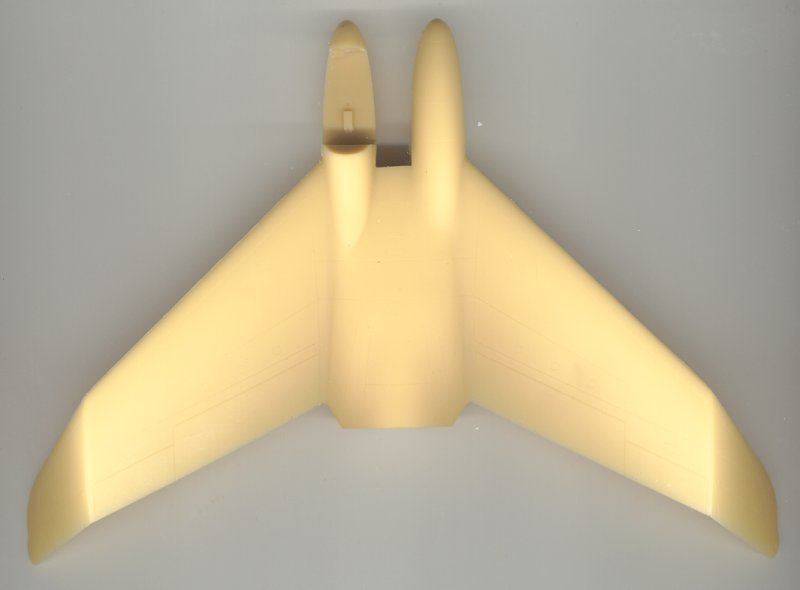
This 1/72 scale (but see below) kit is moulded in cream resin. Panel lines are very fine, as are the rudder/aileron separations. These need additional scribing or they will disappear under the paint. One vacuformed canopy is provided with nice ribbing. Mine had a non- removable flaw, which a dip in Future helped to hide. There are a few pinholes in inconvenient spots. White putty thinned with lacquer thinner makes quick work of these. The fuselage wings and tail is all one piece so assembly is a snap. The remaining parts are the landing gear, instrument panel, joystick, and wheels, wheel well doors and the jet exhausts. There is no room for lead weight in the nose, so the plane is doomed to be a tail sitter (but more anon).
The instruction sheet is the usual CMK exploded view and is adequate.
Adding the jet exhaust outlets and the cones is the tricky bit. Make sure the cones fit inside before you glue the outlets to the fuselage. Some putty will be needed to blend in the outlets. As mentioned there are pinholes to be filled and some seams around the nose to clean up but nothing major. I cleaned up the fuselage, re-scribed the rudder/aileron lines, installed the exhaust outlets, and built the cockpit. I added seatbelts and side consoles (square bits of .040 styrene) to the interior, and painted it RLM02 interior gray with details picked out in red and black. I drilled a hole in one of the main wheel wells and temporarily glued in a piece of coat hanger wire to serve as a handle while painting. Then I masked the cockpit with wet tissue wads (It works!) and primed everything.
You need to drill out all three wheels. For the main wheels, I made short (about 3/16") axles from paperclip wire. This is because the main struts have no axle. The stub of wire sticking out of the wheel can be glued to the struts, giving some strength to the landing gear assembly. Most of the landing gear parts need only some minor scraping to clean up.
Accuracy is the serious problem with this kit. In shape and outline it is very close to various three views I have seen in LSP and Luft'46. However the scale is way, way off. It appears to be about 1/100 scale! Apparently, CMK confused the dimensions of this fighter with the He P.1078B, based on an incorrect reference. The model scales to 31" wingspan, which is correct for the 1078B.
No color options or decals are supplied with the kit, so it's up to your imagination. I went and bought an Aeromaster Reich Defenders decal sheet (Part 6, I think) for late-war Gustavs. This gave me five colour scheme options of approximately the right size decals. I chose a scheme with black undersurfaces and RLM 74/75/76 mottle and splinter on the topside. I am still trying to find a really good way to do the mottle. The airbrush is too fuzzy for this scale, and hand brushing is too sharp. Next time I'll try drybrushing the under-color over the mottle colors to blend them in a bit. I used as many decals as I could to make the aircraft convincing. After all painting and decaling was done, I glued the canopy on with Weldbond, which is excellent for this purpose and added the landing gear and doors .
Except for the scaling problem, I would recommend this kit as a first attempt at resin. It was mine!
And here's a finished photo(s) from Fred followed by scans of the original kit.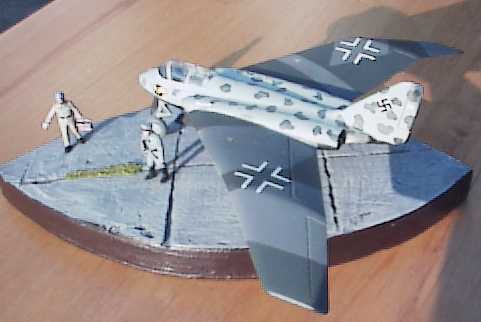 |
 |
 |
 |
 |
He P.1079B & P.1078B - Article
Dan Johnson and I were discussing the issue on these 2 A/C again. I think we can all agree that the 1079B was the single nose and single tail-finned A/C where as the 1078B was the twin nose no tail fin A/C. Also that DDL had the A/C reversed.
What I was discussing with Dan, who was also discussing with John Clarke, was the relative size of the He P.1079B kit by Airmodel. In Dan's Luft '46 page the size is stated as span: 42' 8.2" and length as 29' 6.6". When I measured out the Airmodel kit it only comes to approximately 31' span and 21' 9" in length. I was also pointing out that the intakes were too small to accommodate Jumo 004 or HeS 011 jet engines. The size of the intakes on the other 1/72 A/C from Planet and Special Hobby and other Airmodel kits are all relatively close in size with these exceptions.
Dan checked a few other things and it seems that the dimensions in the listings for the 1078B are what I'm measuring out on the Airmodel 1079B. This lead us to conclude that not only were the designations switched but so were the dimensions. Since Airmodel was basing the A/C on these dimensions the Airmodel P.1078B would be oversize and the P.1079B is undersized.
Other references I've checked again are LSP and Model Art's "German Jets in WW II". Both have the 1078 as the twin nosed A/C. Also in Model Art there is a drawing that shows the length of the body as 5250 which would be over 17'. The tips of the swept wings would be past that so the total overall length would be close to almost 22'.
Dan, I hope I got this all right. We welcome any and all opinions.
Mark H.
As Mark puts it looks very much like the fellows at CMK / Airmodel took the numbers and pictures from DDL as gospel and never double checked!. DDL appears to have the artwork mixed up and the dimensions in the right order! When you use the dimensions from DDL on the He P1079B (13 meters Span & 9 meters Length) they work out to 180 X 125 mm, which are the dimensions of the twin fuselage single engine kit that CMK sell as a hep1079/hep1079B.
When I made this kit I thought at the time this was a big single engine aircraft with a big jet exhaust pipe & long undercarriage legs!
The dimensions of the He P1078B when worked out will give a kit 130 X 84 mm (using the data on the He P1078B listed in DDL), which will be quite small for a twin engine kit.
I hope this helps.