 |
| Manufacturers |
| Li
List |
| Li DM.1 |
| Li GB3 |
| Li GB |
| Li P11 |
| Li P12 |
| Li P13 |
| Li P15 |
| Li P20 |
| Li P115 |
| Li P116 |
| Li P01.117 |
| Home |
Huma 1/72 - cheap
Frank Henriquez

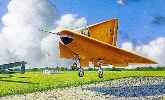
This is a fairly simple kit - upper and lower wing halves, tail fin halves, separate flaps and rudder and a simple cockpit and landing gear. There's a plastic "floor" that serves as both the cockpit floor and the locating holes for the landing gear. Assembly is pretty simple. The worst part is the vertical fin; there's a raised outline on the horizontal wing/fuselage and it takes some work to line up the fin to minimize a step between the fin & fuselage. There's a step towards the trailing edge, but I think this is a real feature. Lining up the fin means that the rudder locating pins will have to be cut off. The main wing will need some ballast to sit on all three gear.
The cockpit is very basic - pretty accurate, since the original had a sparse cockpit - but the kit has a glazed lower nose that looks right into the cockpit. I added PE rudder pedals and seat harnesses. It really helps. The landing gear is small and delicate and unfortunately, needs a fair amount of work to clean up. The original aircraft had wires on each side of the landing gear; I reproduced this with stretched sprue.
Another minor problem with the kit is that - like many of the early low pressure Huma moldings - the panel lines are somewhat indistinct, and don't quite line up between the upper & lower wing halves.
The main problem with this kit is its fragility. The shape makes it VERY hard to handle, so be prepared to drop it often. I ended up replacing the long nose probe with sprue, and had to reglue the landing gear & fins back on many times.
There's a picture of my DM.1 at: http://torgo.astro.ucla.edu/fh.html
Frank Henriquez frank@ucla.edu
German Projects Mailing List
Hi William - just to add my two cents: the biggest difficulty I had was putting enough weight so it would stand on 3 wheels. You can't put it in the nose because of the transparency. In the end I put it behind the cockpit bulkhead; it needed a lot because this position was not far forward of the CG.
Other mods: I drilled holes in the rudder pedals to simulate those shown in the Schiffer reference book. I scrapped the u/c legs and replaced them with steel rod. Scrapped the canopy which was too thick, and scratchbuilt one from plastic sheet and steel wire (using the Schiffer book as a reference).Also scrapped the nose transparancy but still haven't made a successful replacement because of the compound curve.
I could not find a paint mix that would look like plywood. Wood grain decals did not work either. Currently I'm thinking of painting it gloss white and adding NACA decals: purely hypothetical, I agree.
Below is a scan of the kit before construction
