 |
| Manufacturers |
| Li
List |
| Li DM.1 |
| Li GB3 |
| Li GB |
| Li P11 |
| Li P12 |
| Li P13 |
| Li P15 |
| Li P20 |
| Li P115 |
| Li P116 |
| Li P01.117 |
| Home |
Planet Models 1/48
William Moore

This plane comes in a double set with the Zeppelin Rammer in 1/72 but I like the larger version .
Unusually for me a 1/48 scale kit but given it's size it's not surprising . The body comes in 1 piece on a big mould plug with a big bomb and cockpit detail. This was designed to be towed into battle by a JU 188 or similar then glide over the target ( shipping mainly ) and release the bomb and glide back to home - I'm dubious if this would have been possible but it looks great . The kit looks a nice quick build with no vices.
 |
 |
 |
 |
Planet Models with Zeppelin Rammer 1/48 - cheap
Mark Hernandez
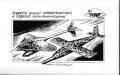
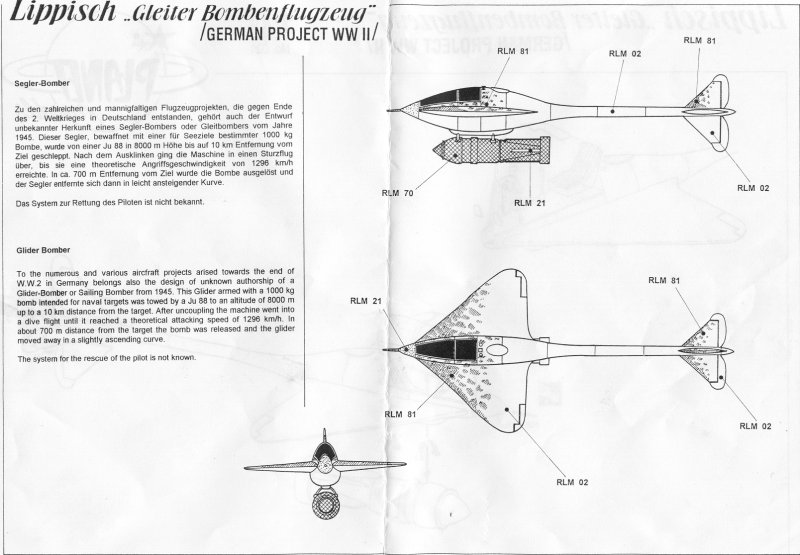
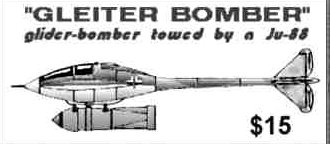
A project for a glider-bomber able to dive at high speed against naval targets provided with a 1000 kg bomb. The machine was carried or towed by a Ju 88 to an altitude of 8000 m up to 10 km from the target. After launch it dived until reaching a calculated approach speed of 1296 km/h. At a distance of 700 m from the target the bomb was released and the glider moved away in a slightly ascending arc. The machine had a folded balloon inside a dorsal tank behind the pilot. The balloon could be ejected and gradually inflated using a compressed gas bottle. The system foreseen to recover the pilot is unknown.
This kit is typical Planet style. There are only 6 parts; the fuselage, nose cone, instrument panel, seat, canopy and bomb. The whole kit measures out to be 4 1/2" long by 2 1/4" in span. The aircraft looks like something out of a Jules Verne novel. Kind of fish like, or even a lawn dart.
The main fuselage is one piece with a nose cone to attach and with the wings attached and the four part tail attached. The trailing edges of the wings are very thin and almost translucent. I did have some damage at the trailing edge wing root to fuselage fillet. It's a slight curve into the body and mine has a few nicks in it. The rod that runs from the main body to the tail isn't quite round or even in thickness. Care most be taken in sanding around this area.
Since the cockpit is very basic I added belts to the seat and a head rest .I added a shortened control stick and I added a few additional wires and handles like a cable release mechanism and an oxygen regulator. I didn't like the look of just sticking the instrument panel in so I made a shroud to go over it and all the way up to the front of the cockpit. I took this idea from looking at interior pictures of gliders someone from my flying club gave me. I made the shroud using shim brass. It took about 3 attempts before I got the right fit.
The kit comes with a 1000 kg bomb. At first I thought this was too big for the kit until I sized it up on a 1/72 drawing of an Ar 234 in the Aero Detail book. It was the right size. However, since this was a future "project" aircraft to attack naval targets I wanted it to look more late war style. I decided to use a BT 1400 torpedo bomb I found in a DML Ar 234 C kit. It worked out great. Now all I had to do was figure out how I was going to attach it since you are not given anything to attach it to, just a rack on the bottom of the aircraft. I drilled 2 small holes in the bomb and super glued fine brass wire. I studied numerous bomb racks of the Fw 190 and other aircraft. The Fw 190 actually carried the BT weapon. What I ended up doing was drilling 2 small holes in the bottom of the rack to accept the wires for the bomb. I then drilled holes in the side of the rack and inserted brass wire which I bent down to shape. I stamped out small plastic disks to act as part of the hold down mechanism. I attached the bomb to the rack and I was able to slip the disks between the bomb and the bent brass wire. This gave me the correct angle on the disks and I just super glued them in position. After they dried I was able to remove the bomb and I could reattach it any time.
I cut out, masked and attached the canopy. This canopy fitted pretty good, or I'm getting better on figuring out how much additional plastic to leave on Planets vacs before a final trim. I then drilled out a hole in the nose to accept a pitot tube. None is provided in the kit so I made my own out of stainless steel rod and tubing. This would be the last item I would attach after painting.
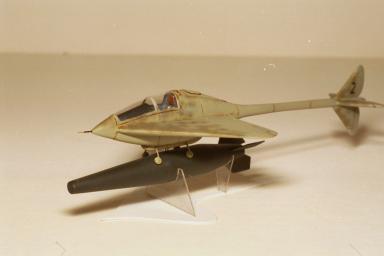
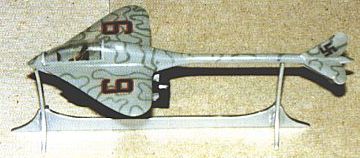
I painted my aircraft with Model Master paints. It`s overall RLM 02 with spots of RLM 81 along the leading edges of the wings, forward fuselage and tail. The bomb is greyish black. I gloss coated the plane. The only decals called out are a number 1 or 2 on the tail. The decals from this kit are bad. Once they stick to a surface they will not come off. So if you make a mistake in placement there's no going back. I was very careful with these decals since I didn't have any numbers small enough to fit or else the others I had were to small.
Some light weathering and then a dull coat.
Since there is no dolly to attach the kit to I made a stand by making a silhouette of the plane in white styrene and using a couple of clear parts for the cradle.
If you want to build this kit straight out of the box you could probably slam this kit together in a couple of nights. Here's Mark's completed kit.
|
|
 |
Lippisch Gleiter Bombenflugzeug
Planet Models 1/48
Jim Sanderson
16 Cream colored resin pieces and a vacuformed canopy. All of the resin is smooth and free from pits on my example. The wings, fuselage and horizontal stabilizers are in one piece; the only detail is fine recessed marks indicating the control surfaces. Care must be employed removing the "sprue" from the front as the "point" of the nose is attached to this area. There is a "scar" on the tail boom just in front of the starboard horizontal stabilizer that should clean up fine. The seat has pilot restraints molded on and looks very nice. The cockpit detail consists of resin rudder pedals, the seat, a center console, an instument panel with recessed gauge faces and gauge bodies extending behind the panel (there will be quite visible on the completed kit,) a gunsight and a control stick. The gunsight is solid resin, and the glass portion should be removed and replaced some of the clear stock that the canopy is formed from. There are no location points in the cockpit, so test fit everything, inclding the canopy, before assembly.
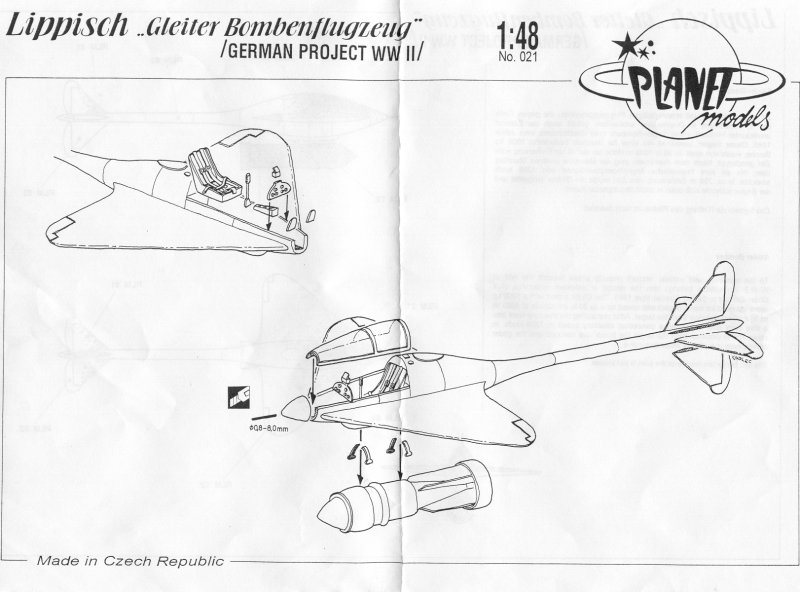
There is a very large bomb to be slung under this diminutive plane - 4 straps attach the bomb to a lumpish structure under the fuselage, and again, there are no attachment points. The bomb is attached to the "sprue" on the tail end, and the fins and ring will have to be hollowed out after removing the excess resin. Finally, after adding the nose cone, a 0.8 - 8.0 mm tube protruding from the front of the plane is called for but not, in my kit, included. No decals are included, and there are no markings shown in the color scheme in the directions. When complete, the kit probably should be displayed hanging in a string harness, because the staps holding on the bomb will be very delicate... Two remarks from the directions: " ...the design of unknown authorship..." and "The system for the rescue of the pilot is not known."
Lippisch Gleiter Bomber
Ceco - Bulgaria - Resin - 1/72
Michael Cook - SAMI Feb or Mar 99
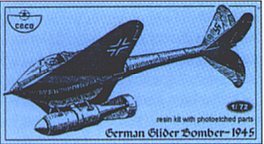
This retails for 7.50 GBP which is about $ 19AUD - Delta Aviation Publishing - email -
The kit is yellowish with nice panel lines , detail set and a display stand. Basic instructions are provided.
Some parts are small and fragile but very little filler
needed. The
brass ring for the bomb is difficult to bend . The canopy is thin and a
good fit . Nose pitot tube in sprue not tube provide. Kit may be
slightly underscale . No decals.
Unicraft - Resin - 1/72
Here's the Unicraft rendition in catalogue form tho I'd go for the Planet one first.