 |
| Manufacturers |
| Me List |
| Me 262 Variants |
| Me P.1104 |
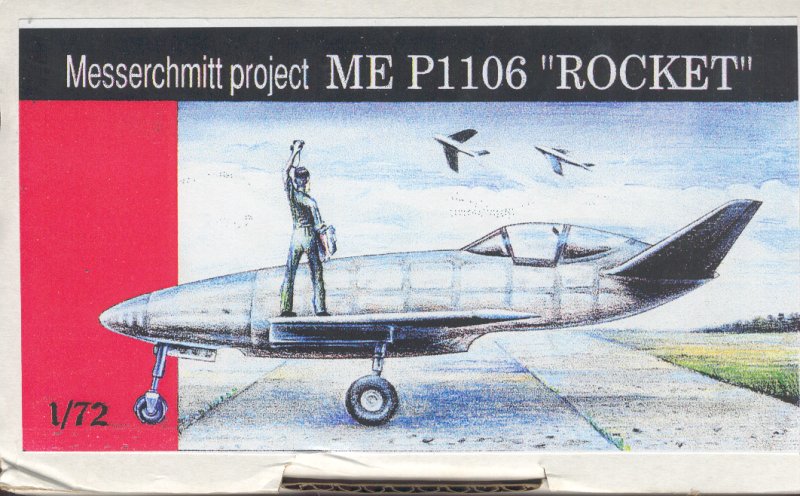
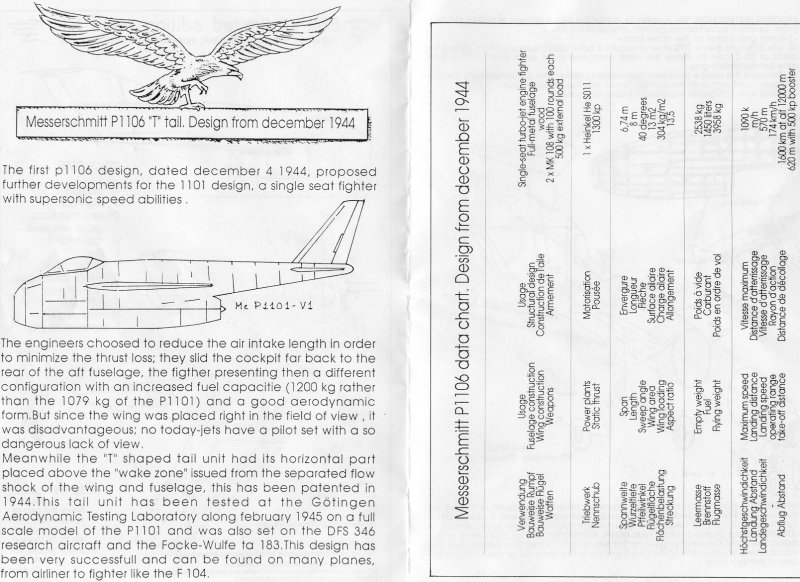
| Me P.1106 |
| Me P.1109 |
| Me P.1110 |
| Me P.1111 |
| Me P.1112 |
| Me P.1114 |
| Me Schwalbe |
| Me Zerstrorer PII |
| Home |
3 Versions - Rocket, T-tail & V-tail
Wulf Corbett
He's getting better, but... Moulded in a translucent white resin, with phenomenally fine etched detail on wings and tail, trailing edges razor-sharp, fine parts very fine indeed... etc. However, I'm now convinced Sharkit should do a rethink on their fuselages. My Horten fuselage halves were warped, my FW-Victoria Tail lacked surface detail and had a bad mould mark, and this one lacks ANY surface detail, has afairly bad mould mark under the whole fuselage, has no pronounced rocket exhaust, AND is moulded slightly awkwardly. Maybe he figures by moulding the nose separately it'll be easier to add weight, but it just looks like an unnecessary complication. Also, despite wheels and u/c legs, plus main wheel doors and some shallow indentations for main wells, there are no nose doors, no nose well of any kind (just etched detail of the well shape on the nose piece), and no drawing of the door shape on the instructions... Very irritating given the beautiful quality of the wings and small pieces.
This is the rocket based version of the above jet version. |
 |
 |
Doug Devers
Just got this one in the mail the other day, and in what may
be a
dangerous precedent, I've
almost got it ready to paint! The kit is a pretty basic presentation of
a rocket-powered
research aircraft intended to be a mach-buster. Here's a quick review.
One piece fuselage, with a nosepiece that is the right width, but with almost a 1/8 inch over on both top and bottom! No problem really, just glue it on and sand away. The main gearwells are sort of suggested, but the nosewheel bay is scribed only. This is why they make Dremel tools. The wing to fuselage joint is sort of a bitch as it is a compound curve, but if you're careful with the knife and sandpaper when you remove the casting block from the wing, it DOES fit pretty well.
The cockpit will need to be hollowed out some more, and it needs some fiddly bits form the spares box, as the only part you get is a pretty generic seat. The v-tail is gonna need some work, as the tail surfaces don't match up to their respective fuselage locations very well, but I think that after a bit more attention with the file, that'll work out. too. The outlines now that the wings are on the fuselage match up pretty well with the "Secret Messerschmitt Projects" illustration.
I'm thinking I'll go with a basic Me-163A layout. After all, this is purportedly a 'research' aircraft to study high speed flight, and it has the same engine (well, close- a Walther of some sort.
The 1106 has the wings and tailplanes fitted, and the first
coat of
primer is drying. In one
of those sort of oddball 'modeling optical illusions' that happens
sometimes, the vac canopy that looked to me like it wouldn't fit at
all, fits perfectly! :) Think I will go with the
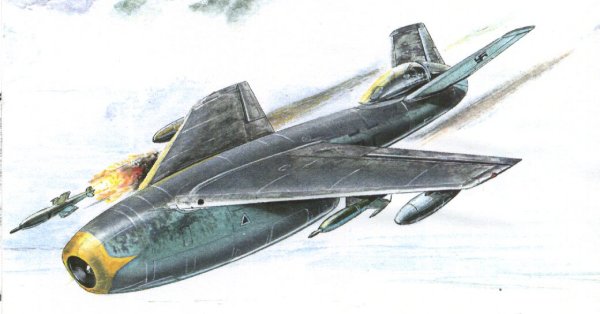
RLM02 overall, as the boxtop looks to be a bitch to replicate. After
looking through the spares box, I found a couple of rudder pedals, and
a brass instrument panel from a FW190 (I think). After checking to see
how visible it was gonna be under the glare shield and through the
canopy
(not very) I decided not to sacrifice another kit for it. The landing
gear parts aren't bad, really but they ARE pretty thin to support any
weight at all.
The more I mess with this one, the more I decide to do to it. After deciding on doing a cockpit up right, I realized what a chore it was going to be. I made a floor from sheet styrene, and folded, & soldered a Reheat brass seat and rudder pedals for it, and I've spent most of the afternoon making LG wells, and enlarging the cockpit "hole" in the fuselage enough to fit the goodies inside. It's really a bitch, reaming out the solid fuselage, leaving the sidewalls thin enough, without going through. (every time I get the urge to throw it across the room, I come back to the computer, have a smoke, and chill out :) It's gonna be cool looking in an odd sort of way, I think. Progress is slow but sure. I think after this one, it will be time to slam out a Monogram "shake 'n bake" kit, and give the Dremel tool a rest.
Well, I'm STILL screwing around with that 1106R. I put the canopy frames on today (aluminum foil, not too bad a job), and after looking the fuselage over, did a little more sanding around the wing root, then primered AGAIN.
Wulf Corbett
Just a few lines about my recent delivery of kits from Scott Lowther's 'Part Time Models'. Rather than bother describing them, take a look at them at http://www.webcreations.com/ptm/luft.htm
Like all of PTM's kits, these come with only the minimum of parts, with plenty of flash to clean and a fair bit of pinhole filling to do.However, the parts are solid and well-defined, and the flash cleans easily. And as for holes, there are far worse around! No real complaint here. Scott has a love of solid shapes, and moulds them well, in this case especially the 'Courier'. ( see earlier )
Detail is a minimum of finely inscribed lines (mostly just u/c doors) plus deeper inscribed control surfaces. Cockpits are just holes (fair enough, I can add my own detail), and there is no undercarriage, or even wells, doors being moulded shut (sorry Scott, this is my only real complaint...).
The rocket powered version of the 1106. Nothing much more to
say
about this one, there isn't
much OF it! Only 3 resin parts (big bit, plus 2 tail fins) and a
transparency. u/c doors are
BARELY visible on his one.
Part Time Models 1/72 (original design)
Not shown on the website, this is the 1106 with cockpit faired into the 'T' tail. Same plan dimensions, with deeper 'belly' housing a jet. Same comments too, except a single piece horizontal tail, and a jet cone are the small bits. Nicely done u/c doors here.
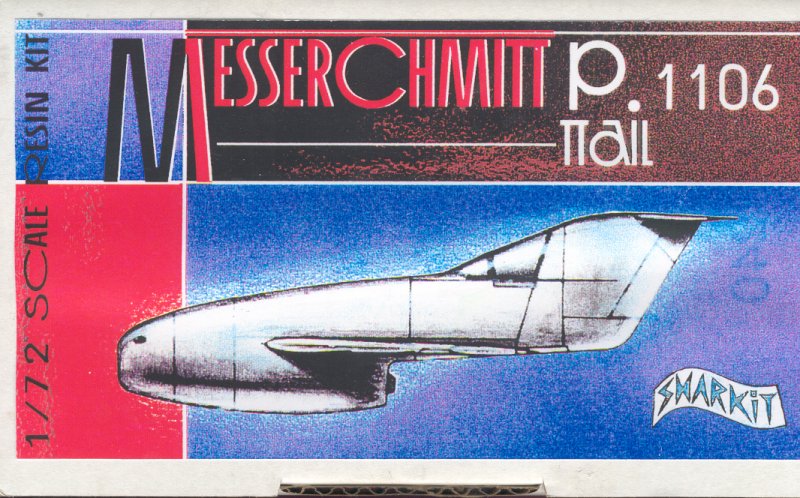
P 1106: Similar to my P. 1106R, with few parts.
Wing/fuselage/rudder
molded together; a single horizontal stab, and exhaust cone and a
cockpit transparency finish it up. Not included are landing gear or
cockpit details, or decals.
Dan Johnson
Once again, there is no landing gear bays, but landing gear are supplied, as is a seat. Looks like a simple build, as long as you build it in flight-style. There's something about this that looks very Forties....
 |
 |
 |
Huma 1/72
Dan Johnson
This is pretty much your standard newer Huma kit. There are none of the extra-fine small injected parts that are present in some of their other kits, such as the DFS 346 or the Fa 223. The kit is all injected plastic with engraved panel lines. There are the usual two fuselage halves, and the each wing and stabilizer is molded in one piece.. There is a rather nice jet engine included, although it can barely be seen once it is trapped inside of the fuselage. The cockpit consists of a seat, stick and instrument panel (which is provided with an instruments decal).
Building is fairly straightforward, but remember that this kit is extremely tail heavy! I put weight inside of the engine halves and on top of the engine. After I inserted the cockpit section and engine inside one fuselage half, I joined the other fuselage half to it. I then noticed that some of the panel lines on top of the fuselage halves don't line up (one of my main modeling pet peeves!). After a little putty and sanding work, I then added the wings and V-tail. They both fit nicely, with little or no putty needed.
Next I primered and touched up any bad spots, then I painted the Me P.1106 in a
RLM 76 lower, RLM 82/83 upper camoflauge scheme. The aircraft looked a little "bland" to me, so I hand brushed the jet intake in RLM 04 yellow. I added decals from the usual variety of other kits and decal sheets. The finishing step was to add the landing gear and canopy, and voila, I had myself a Me P.1106!
This Huma kit was based on a later
variant of
this project, RS Models does an earlier variant in
resin (which I should soon have). Please visit my Luft '46 website to
learn more about this
German aircraft project and to see photos of the completed kit, at:
www.luft46.com
Rating:
Accuracy: It looks pretty good, I'd give it a 9/10
Assembly: Other than some of the panel lines don't line up, there are no hidden pitfalls here, as long as you remember to put plenty of weight up front. 7/10
Material: The kit is all injected plastic, remarkably flash free 8/10
Instructions/Decals: The usual Huma exploded view serves as the building guide, and the decals are very basic, consisting of fuselage, upper and lower wing crosses, and those funny-looking boxy black squares for swastikas 6/10
Overall: Even with the small problems noted above, this is a fine kit and I recommend it 8/10
Dan Johnson

John Clarke N.Z.
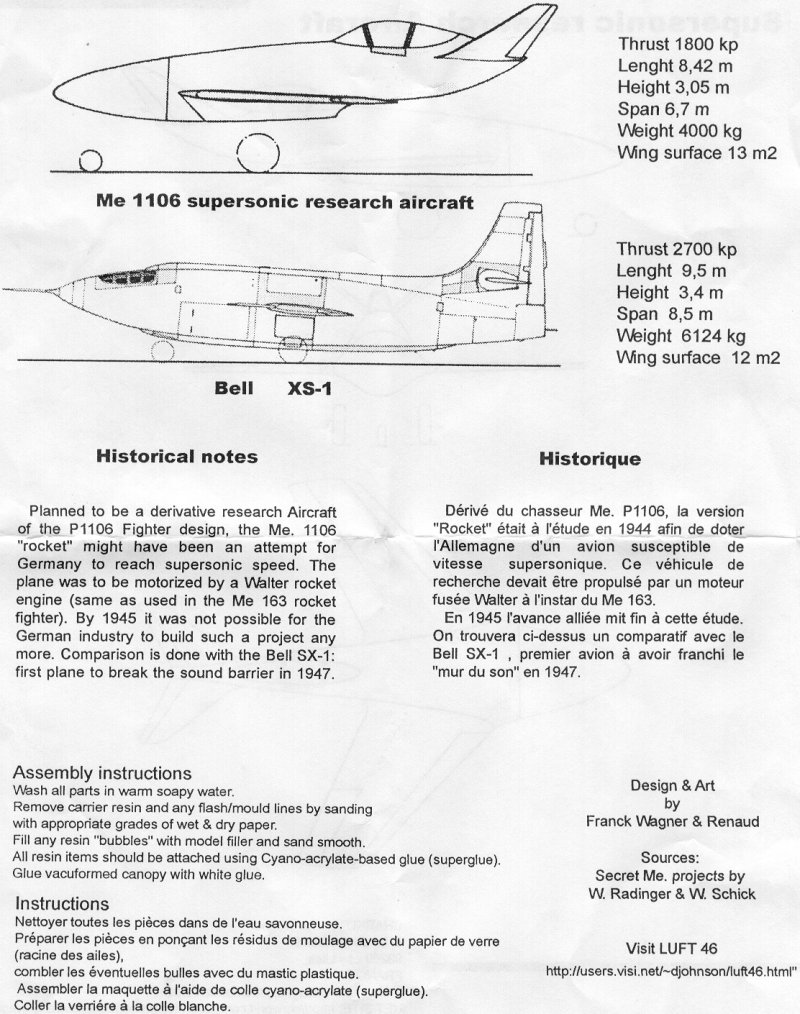
This is another one of those Messerschmitt projects to produce a small cheap fighter, ultimately doomed to failure. The project itself came in quite a few forms of the same basic configuration and this one seems to come straight out of "Secret German Aircraft Projects of 1945".
The kit itself comes wrapped in the normal segmented plastic bag which is in a sturdy box.
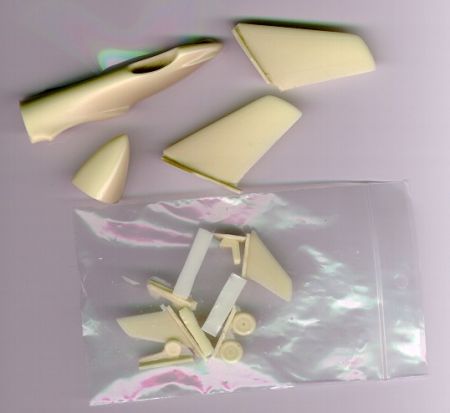
The fuselage comes in two pieces hole free but with some flash, the wings are hole free and flash free. The fuselage comes with a nose weight (for the tricycle undercharge) moulded in. The fuselage halves will require some filling on my example, the wing fuselage joint only minimal filling.
The small parts come joined in two circular membranes again blemish free, the undercarriage legs have encased in the resin wire reinforcing (so no undercarriage bow here), also included are underwing drop tanks and a couple of wire guided X-4 missiles. ( Quite nice too - William )
The kit as normal only comes with one vacuum formed canopy so some care is required here as they have been known to split in the wrong direction occasionally.
All in all a nice well thought out kit that should present few problems, and direct from RS Resins at US$13 plus postage a reasonable price for a resin kit.
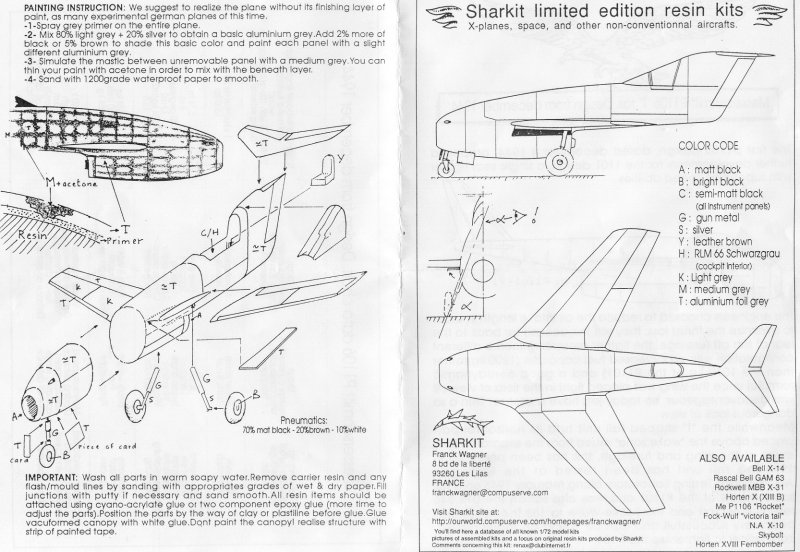
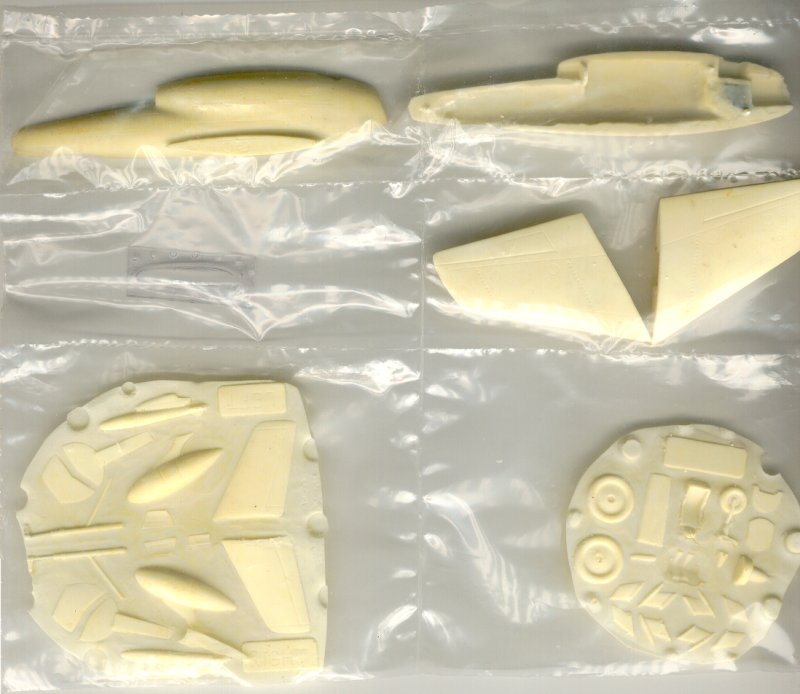
Here the scans of the instructions and kit parts as well as a completed one from John Clarke.
 |
 |
 |