 |
| Manufacturers |
| Me List |
| Me 262 Variants |
| Me P.1104 |
| Me P.1106 |
| Me P.1109 |
| Me P.1110 |
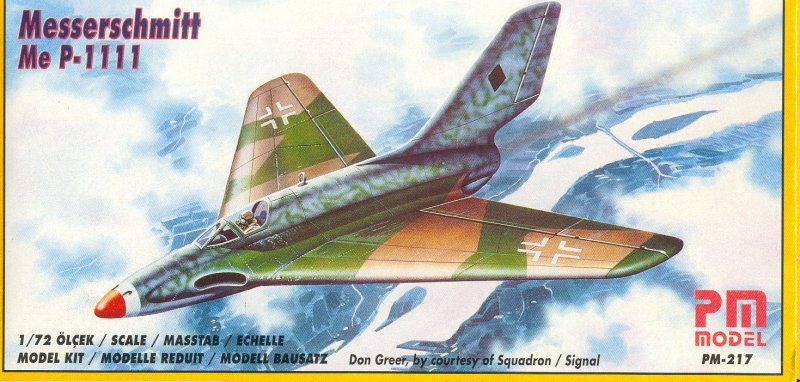
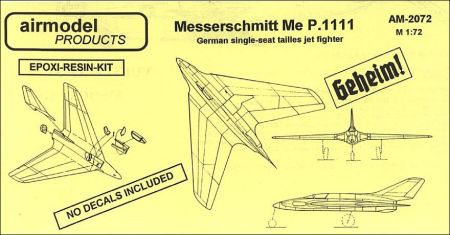
| Me P.1111 |
| Me P.1112 |
| Me P.1114 |
| Me Schwalbe |
| Me Zerstrorer PII |
| Home |
PM - Injection Moulded 1/72
Edward Philpott
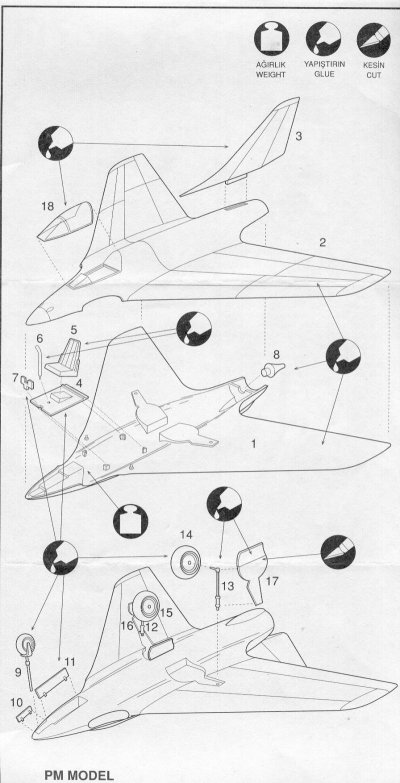
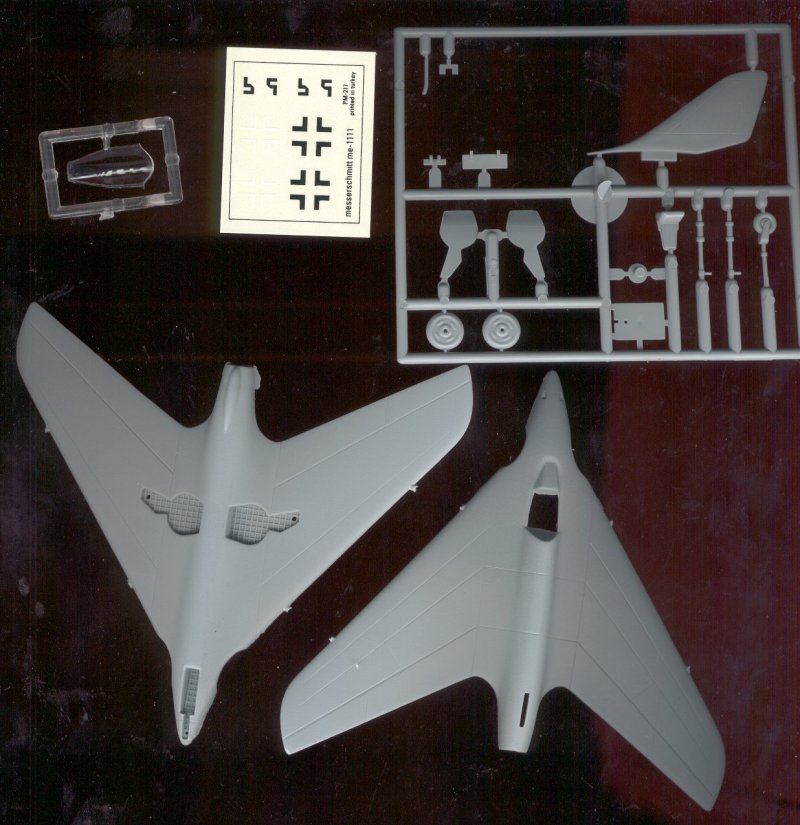
PM models new offering comes with crisp panel detailing and not much flash. Construction is straight forward. The fuselage is a top and bottom affair and the cockpit detail is just a seat, stick, rudder pedals and floor. Super detailers may want to add side consoles and instrument panel plus straps for the seat.
Once together with blanks to the intakes to prevent a see through effect the sides just need some sanding to make them blend in and once the separate fin is glued in it looks great!
The undercart legs are quite thin so care is required also do not forget to add nose weight before hand or a taildragger will result. At least there is room in the nose unlike the resin versions.
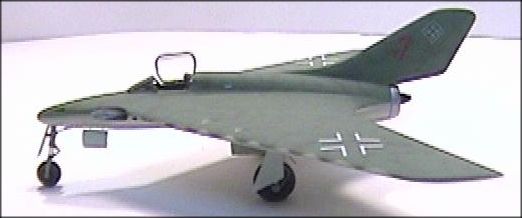
Once finished I deviated from the kit colour scheme and opted for upper surfaces in splinter colours, grey undersides and yellow nose. Decals are just limited to crosses and two piece swasticas but they go on well. Finally,does it look like a P1111? When compared to some 3-views of the project it looks the part though the production machine might have looked different.
My verdict? Get it!It looks good next to my P1101, P1106 and Ta183!
edwardphilpott@hotmail.com
 |
 |
 |
 |
 |
 |
 |
Mark Hernandez
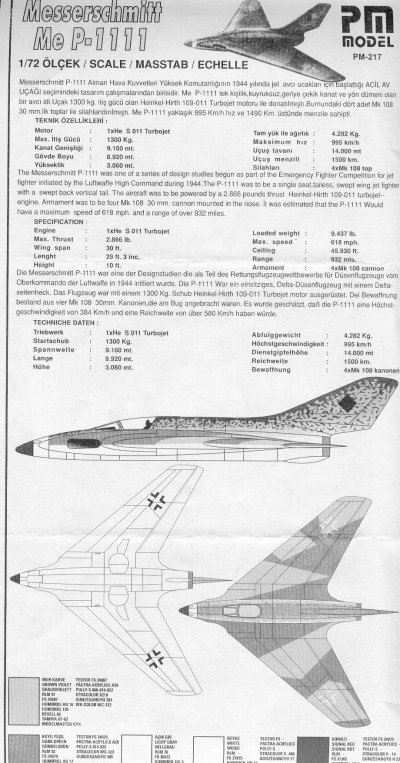
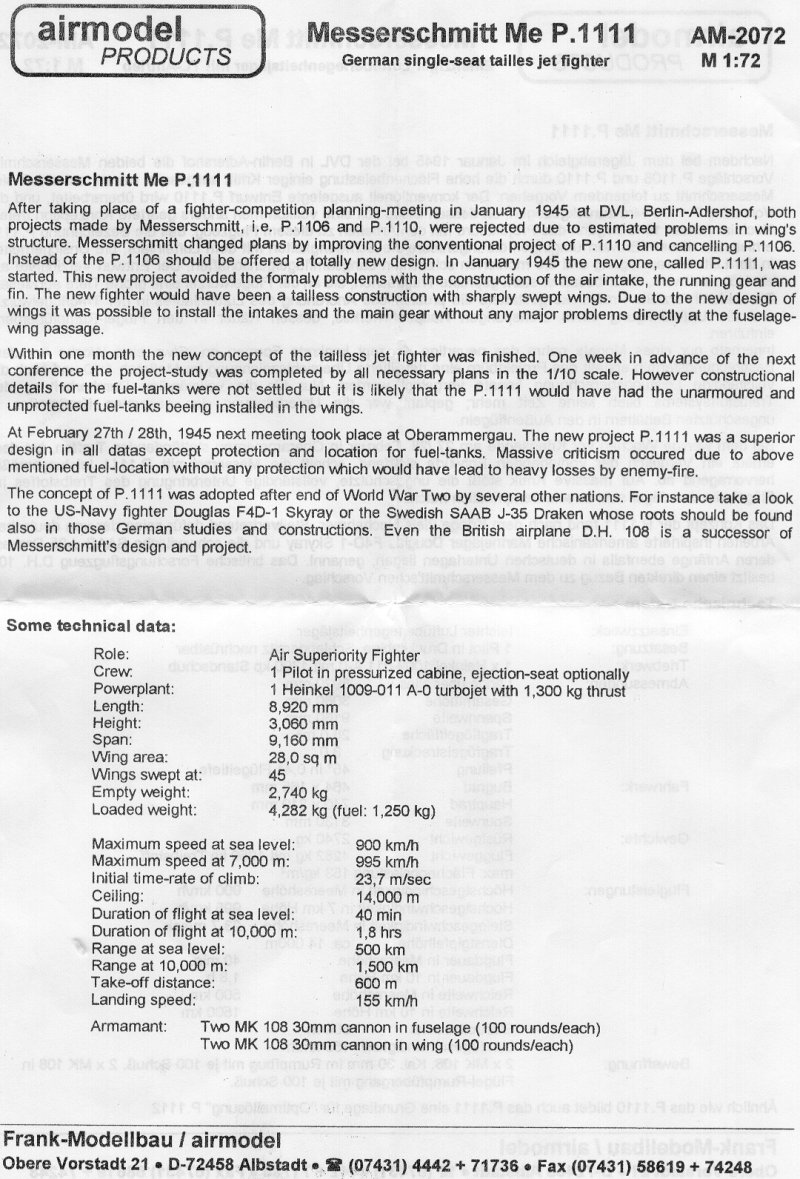
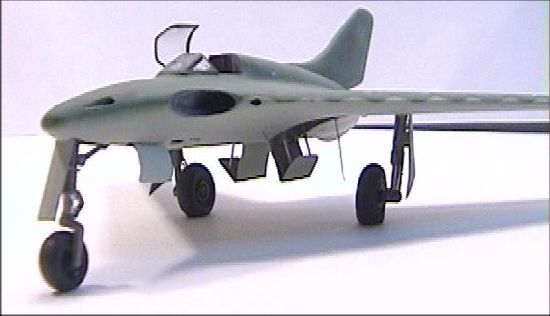
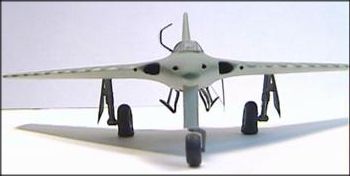
In January 1945, the Messerschmidt Project Bureau began work on the P.1111. The design was for a single-engine tailless jet fighter with the wings swept back at 45 degrees, being a near-delta shape and the intakes located at the fuselage-wing passage. The entire fuel capacity was to be housed in unarmoured tanks in the outer wings. There was a single swept-back vertical fin and rudder. The cockpit was pressurized, fitted with an ejection seat and had a fairing extending to the base of the fin. The armament consisted of four MK 108 30mm cannons, two in the wings and two in the nose.
During a design review comparison conference in Oberammergau on February 27 and 28, 1945 the P. 1111 fared outstanding in the area of performance in high-speed flight capability, take-off, climb and landing performance. The experts held the opinion that these qualities demonstrated a fundamental superiority of the flying wing construction type. However, the P.1111 was ruled out due to the impossibility of protecting the fuel.
Following the war the P.1111 concept had many imitators. One only needs to look at aircraft such as the British de Havilland D.H. 108 and 110, the American navy fighter Douglas F4D-1 Skyray and the Swedish SAAB J-35 Draken whose beginnings lay in German documents.
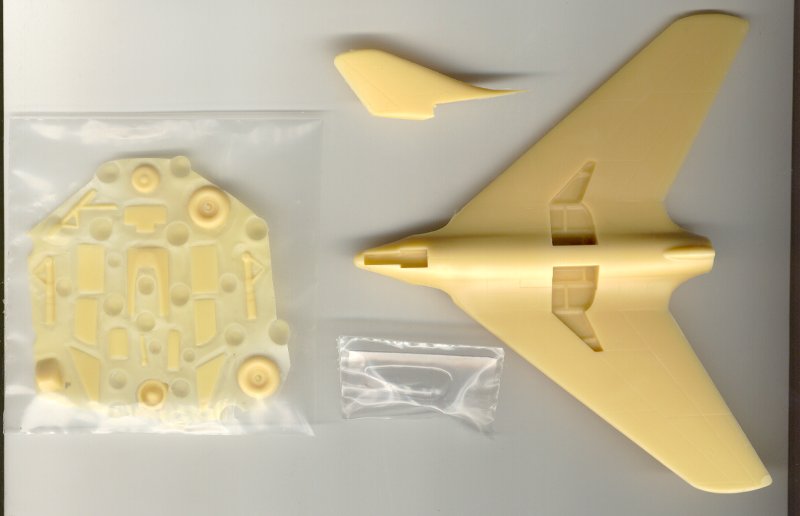
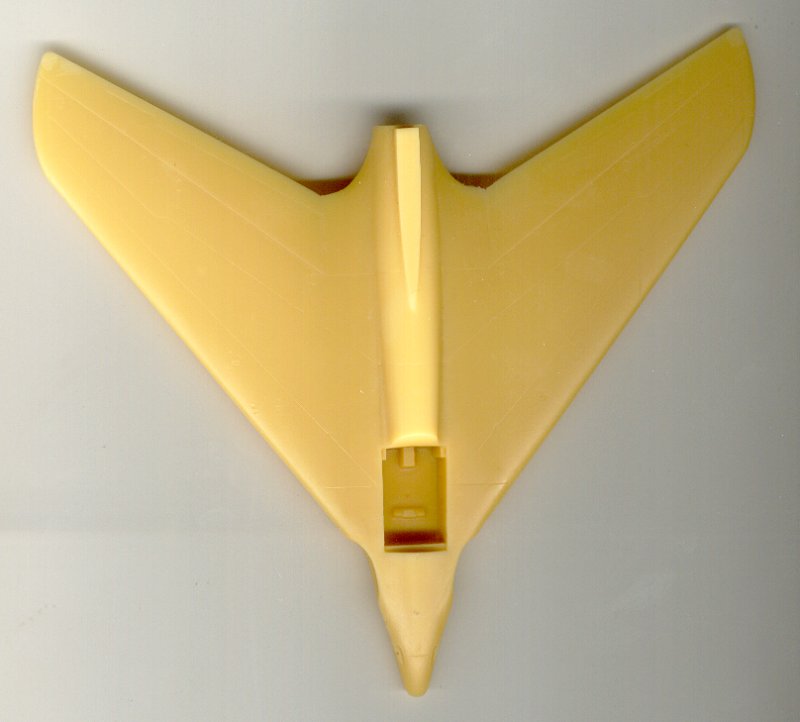
This 1/72 Airmodel kit is moulded in a light yellowish tan resin with a vacuform canopy and no decals. The whole kit is almost one complete "solid" piece so there are no fuselage halves or wing roots to sand. The only other major parts are a few standard cockpit interior pieces, the upper part of the cockpit to cover it and a separate vertical tail and exhaust pipe. The other pieces consist of the landing gear, doors and wheels. Not counting these gear pieces the whole kit is 4 pieces. The mouldings are crisp with fine engraved panel lines and other surface detail.
The first thing I did was to clean up the mould parting line that runs along both sides from the front fuselage then along the wing leading edges and back to the rear fuselage. Next I sanded what appeared to be the remains of moUld retainer parting blocks from the top and bottom of the wing tip trailing edges. I had to lightly rescribe the outer portions of the aileron to wing attachment line.
Next I drilled out the 2 gun ports in the nose and the 2 in the wing roots just outside of the intakes. Because the kit is moulded as a solid piece this means the intakes are also solid. I decided to open up the intakes instead of just covering them up with a FOD cover. I ended up boring out the area all the way back past the cockpit area, almost an inch deep. It looks pretty good and has a nice round-to-oval shape to it angling back. It's very thin next to the cockpit area. The whole process of drilling and sanding and rechecking and repeating the process took about 4 hours to do both sides, with a pile of resin shavings and dust. Quick, get out the old Dirtdevil vacuum cleaner! I did this all by hand as I was afraid if I used my Dremel I'd slip and mess up something. The tailpipe exhaust cover has a moulded in cone that is not very deep. I drilled this part out so that I was just left with the round tailpipe exhaust tube.
Next I started working on the cockpit. Again, because the kit is a solid mould it's going to be a tail sitter. I drilled and carved out a portion of the nose area so I could add lead weight. I had to be careful where I drilled because the nose wheel well is right there. I also added some more weight in the cockpit area just in front of the instrument panel but it won't be seen once everything is installed. I used a mouldable lead weight I found in the railroad section of a local hobby shop. It looks like a couple of quarter inch round, two–and-a–half-inch long rods. I taped on the tail and exhaust pipe to keep checking the center of gravity to make sure I had enough weight to keep it on its nose. Whenever you think and feel that you have it right always add more weight because it probably won't be enough! But space is very limited up front. To relieve some weight I drilled out about two inches in depth from the back end of the kit where the tailpipe fits. I made an exhaust fan and cone to cover the hole, which will be installed at the end of the assembly. Besides, this hole in the back makes an excellent place to inset a rod to mount the kit on when it's being painted.
The only parts provided in the kit for the cockpit are a seat, stick and instrument panel, and the rudder pedals are moulded in as little blocks. This is too sparse so I completely scratchbuilt the cockpit. I built side consoles and I added panels, switches, handles and throttles to it from Reheat and Airwaves sets. I took and modified a Me 262 instrument panel from Cooper Details. I also used the control column, rudder pedals, kick plate and seat and shoulder belts from the same set. I scratchbuilt my own ejection seat based on one from a He 162. I built my own gun sight based on the EZ 42 gun sight that was being tested on Me 262's at the end of the war. The interior was painted RLM 66 and the instruments were painted black with details picked out in white. Some of the instruments have the circles picked out in yellow and red like those seen on various jet instruments panels of the time. The glass was simulated with a couple applications of Future floor polish. I then glued on the part that fits over the cockpit section and blended that into the rest of the body.
Next I glued on the vertical tail. The leading edge tip of the tail at the fuselage joint was very thin and broken on my kit. I built up the area with super glue and faired it in. I then glued on the tailpipe.
After this I wanted to check on how the vacuform canopy fit. When I cut it out I left some extra material around the edges but it still does not have a good fit. So I opted for an open cockpit. After all, with all the detailing I did why cover it up. The front windscreen fits okay. I added the armored windshield by cutting out a piece of thick plastic from a tie pin box. I sanded it down slightly and then polished it up and coated it with Future. I then painted the edges RLM 66 to simulate the holding frame.
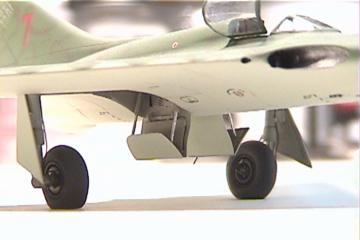
I then started to work on the underside. I made new gear doors using the kit ones as a template. The main gear doors are in three pieces. One piece of the main doors attaches to the landing gear leg. The hard part was trying to figure out how the other two would look like when the gear was down. I figured that the inner and middle gear doors would be attached to each other when the gear was lowered or retracted. But if they were just straight down the two combined would hang down too far when open. What I did was to fold up the middle door to form sort of a "V" when the gear was "down and locked". I thought that with typical German over engineering the door would swing open and down when the gear would be cycled.
The main undercarriage legs from the kit were mis-moulded and not round; another scratch building job to do! The kit U/C legs also seem to be too thick compared to other aircraft in this scale. I used a smaller size of some combination extra thin walled stainless steel tubing and rod I had ordered from Small Parts Inc. It's just barely big enough to fit in the tube cutter I have. They've got great stuff that can be used in scratch building. I used a combination of this tubing and some brass rod and tubing to make the main landing gear struts. The main tires are also oversized for the kit so I took a pair from the spares box. I added some brake lines by using fine detail wire and added some gear retraction arms and torque links.The nose gear is not much better and I replaced it using the strut, retraction arms and wheel from the Revell Me. P.1099. I used gear door hinges from a Me 262 Airwaves set.
Now I was ready to begin painting. I stuffed paper into the cockpit and jet intakes and taped them off. I taped off the exterior of the tailpipe also. I painted the wheel wells Testor's Model Master RLM 02. When they were dry I used the kit supplied gear doors to cover the painted wells.
I used Aeromaster Warbird acrylic RLM 84 for the underside color. I was trying to decide how I would paint the top color. Should I do a typical splintered two-tone German scheme or come up with something else? I referred back to the Schick and Meyer book "Luftwaffe Secret Projects" and in the book they have a drawing of the P.1111 with a light green top color with a darker green serpentine pattern. I decided that I would try this out. I already did something similar on the Zeppelin Rammer that I built. So I painted the top portion Model Master enamel RLM 83 light green and then did the serpentine pattern with Model Master RLM 81 brown-violet. I then gave it a couple coats of Future. I let this dry for 3 days and then started with the decals. (On RLM 82 and 83 colors I always refer to the paint manufacturer's bottled color because there is much discussion as to whether color RLM 83 was light/bright green or a dark green. Most researchers now agree that RLM 82 is the light green while RLM 83 is the dark green. However, most of the manufactures have this reversed. As of this writing I have not seen the new Gunze or Testors Acrylic RLM colors to see if this trend has been corrected.)
Since no decals are ever provided with Airmodel kits all of the decals I used for the P. 1111 came from various sources like Cutting Edge, Superscale, Extratech, Propagteam and Aeromaster. Once these were on and dried for a few days I sprayed an overcoat of Future to seal them. I then gave it a light weathering with artist watercolors. After all this I then gave it a spray of Testor's Dullcoat.
I painted the tail pipe Testor's jet exhaust. I then removed the wheel well covers and installed the landing gear, doors and retraction arms. The wheel hubs were painted semi-gloss black and the tires were painted tire black.
I removed the tape covers over the intakes and cockpit. I masked off the canopy and windscreen and painted RLM 66 for the undercoat and then RLM 83 for the topcoat. I then did a light spray of Dullcoat over this. I removed the masks and attached the gun sight, canopy and armored windscreen.
Another Luftwaffe '46 kit finished to add to my ever-growing collection.
I know this kit just screams for some X-4 missiles to be mounted under those big delta wings. I think I'll leave it in the clean configuration for now but I can always come back and add some later.
If you want to build this kit straight out of the box you could probably put this together and finish in a matter of hours. But with my devotion to Luftwaffe '46 aircraft this kit deserves better. This kit builds into a very nice aircraft of what might have been. There is one book out on German projects that shows this plane on the cover in combat over flying an F-92. Strange, since the XF-92 was based around the captured Lippisch DM-1.
I understand that PM Models are supposed to come out with a
1/72
injection molded kit of the P.1111 sometime in the summer of '98 (kit
#0117). We'll have to wait and see how the kit is. Hopefully they have
improved their kits much like Huma has in the last couple of years. If
not it could end up looking like the Go 229 V7 that they recently
released. Maybe the only good part is that it will probably be a
quarter of the cost of the Airmodel kit which retails for around $24
through Aviation USK. Maybe PM Models used the Airmodel kit as a
pattern, We'll have to wait and see!
 |
 |
 |
 |
 |
 |
 |