 |
| Manufacturers |
| HS List |
| HS 132 |
| HS P 75 |
| HS P 87 |
| HS P 122 |
| HS P 135 |
| HS PJ 600/67 |
| Home |
Airmodel 1/72 - $35 AUD
William Moore
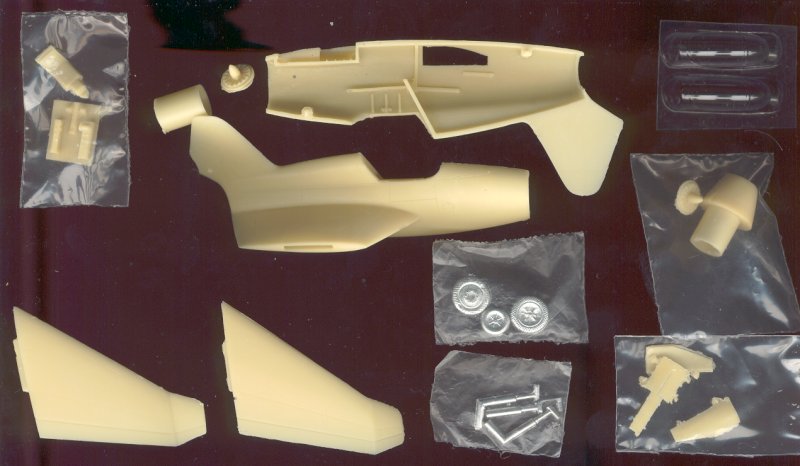
This kit looks more like an injection moulded one even down to the locating pins on it. The cockpit area has nice detail in the form of stringers and instruments on each side. U/c bay detail is also quite nice . On my copy part of the tailplane has broken off but this should be easy to fix. The plane is quite small. The provided instructions are reasonably clear in an exploded form with a little thought required for some placements. There are a few air bubbles but not bad . All detail parts are nicely moulded but some will require a little cleanup . For all us vacform canopy lovers Airmodel have generously included 2 canopies in case of stuff ups. The u/c is also all white metal which should make it very sturdy .Given it's a tricycle u/c some lead weight under the intake and above the front gear bays may also be advised . This was yet another design for the fighter emergency program of '44 . Well recommended.

Henschel Hs 135
Airmodel 1/72 resin
(SAM v.18 no.6 Aug 96 Mike McEvoy)
I am not sure if this is Airmodel's first venture into German projects in resin, though I know they have produced vacuforms in this field.
In some ways, although a tailless delta, it looks a more likely aircraft than some of the others of which kits have been produced, perhaps because of its slightly portly appearance which gives some credence to the idea that there really could have been a practical engine installed. This according to Volume 3 of Heinz Nowarra's Die Deutsche Luftrüstung 1933-45 would have been an HeS.011, and the armament four MK 108 cannon.
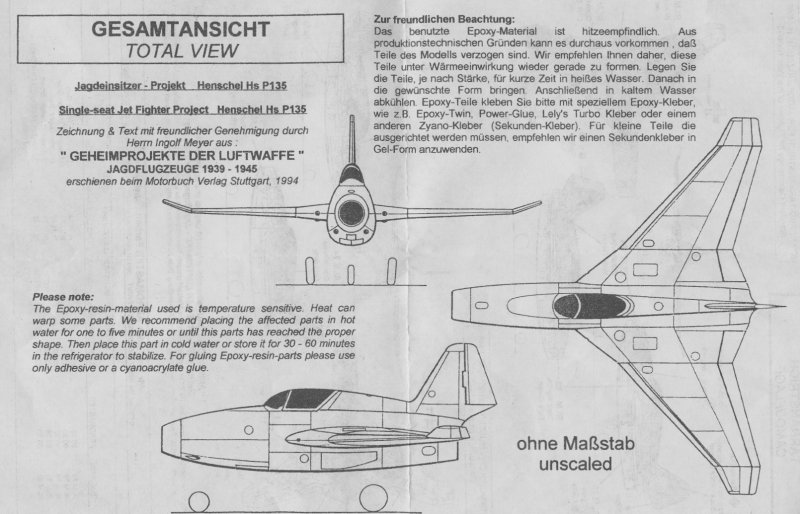
The breakdown of the kit is very like that of a conventional injection moulded model with hollow fuselage halves, a cockpit area with seat, panel and consoles, a jetpipe with turbine disc at its closed end and a separate intake section. The undercarriage legs and wheels are in white metal which I much prefer to resin for these potentially fragile parts, and the resin doors have little lugs to assist fitting.
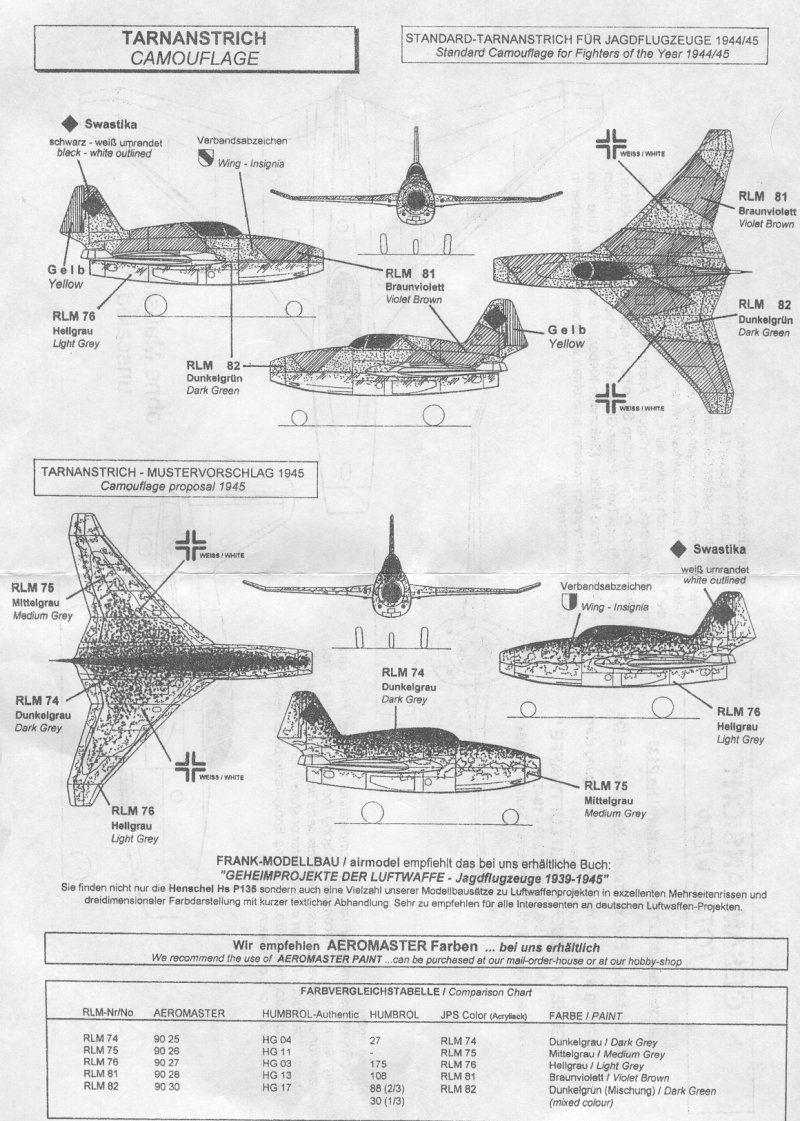
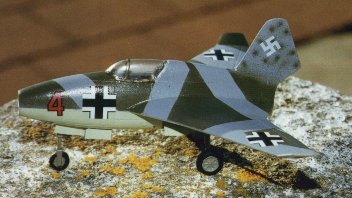
While there are no decals with this kit, the instructions do give a pair of suggested schemes -- these are better than most in this category, and also have good information on the project -- one in greys and one in greens, and there is a table of equivalents from various paint sources.The decals came from the spares box, and the use of the II/JG.54 patch from an MSAP sheet gave rise to the yellow Ostfront markings.
This style of kit and model is a matter of taste, and is of course very much to mine. If you have not attempted one of these before, this is a very good one to start with, well cast and well fitting, and to my eyes at least, looks convincing, a rather more practical flying machine than several that have been given this treatment.
Here is a scan of the partsand instructions followed by John Clarke's completed kit. |
 |
 |
 |
 |
 |
Note there is a Unicraft version but take the Airmodel one if you can find it . Given current availibility I'd try the Unicraft offering.