 |
|
| Manufacturers | |
| BV
List |
|
| BV 40 | BV 141 |
| BV 155 | BV 237 |
| BV P163 | BV P170 |
| BV P178 | BV P179 |
| BV P184 | BV P188 |
| BV P192 | BV P193 |
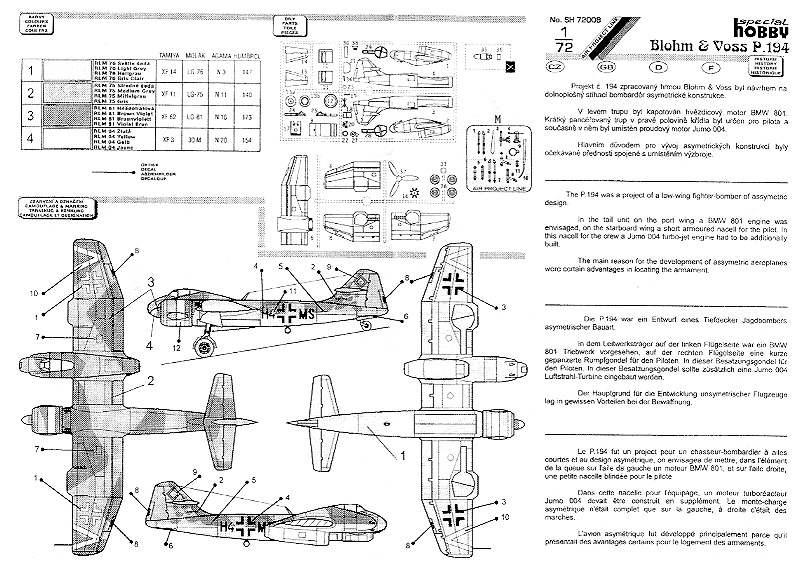
| BV P194 | BV P196 |
| BV P197 | BV P198 |
| BV P202 | BV P203 |
| BV P204 | BV P205 |
| BV P207 | BV P208 |
| BV P209 | BV P210 |
| BV P211 | BV P212 |
| BV P213 | BV P215 |
| BV AE607 | BV MGRP |
| Home | |
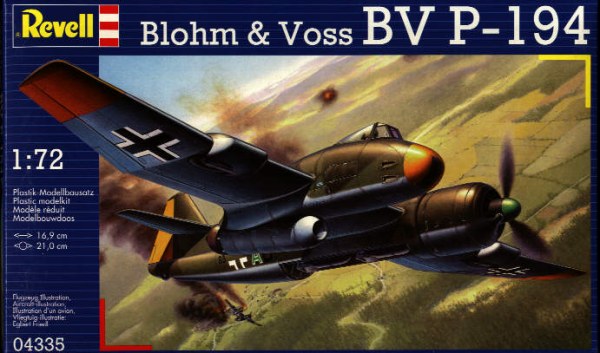
Revell - 1/72
Andres Valdre
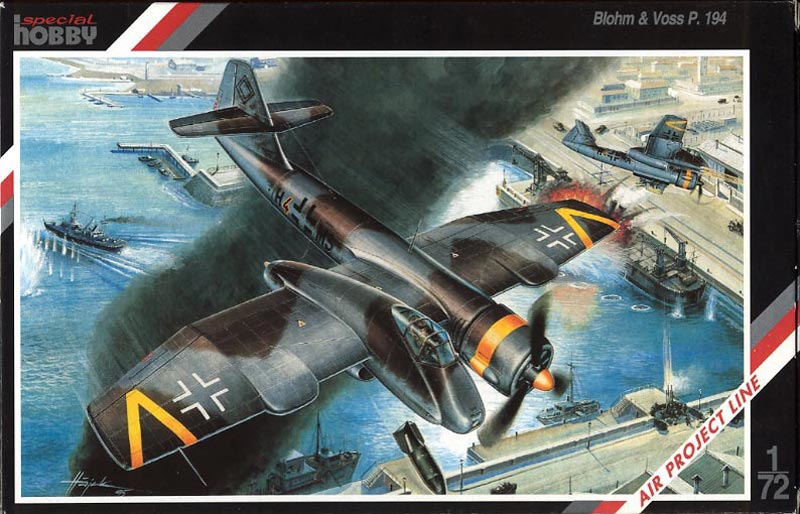
Kits of B&V P.194. According to my database of German WWII aircraft model kits (which includes now data about 2,000 kits, 400 decal sheets and 800 detail or conversion sets), there are 4 kits about the Bv P.194 available:
Bv P.194 by Special Hobby (injection moulded, with photoetch parts);
Bv P.194.01 by Airmodel (resin);
Bv P.194.01 by CzechMaster (resin);
and Bv P.194.02-01 by Revell (injection moulded).
All four kits are in 1/72.
First impressions of the Revell kit. The quality of the kit seemed excellent, a proof of constant improvement of Revell kits - no flash on parts, good fit, no ejection or sink marks etc.
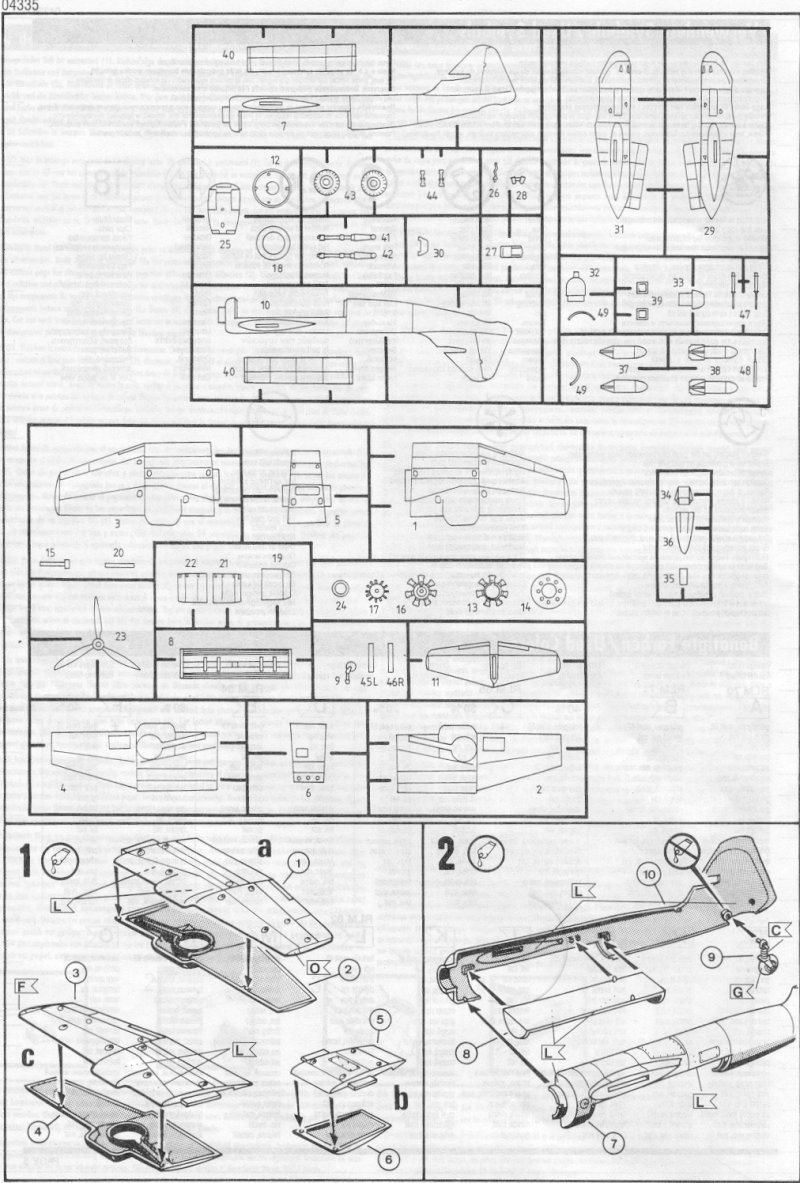
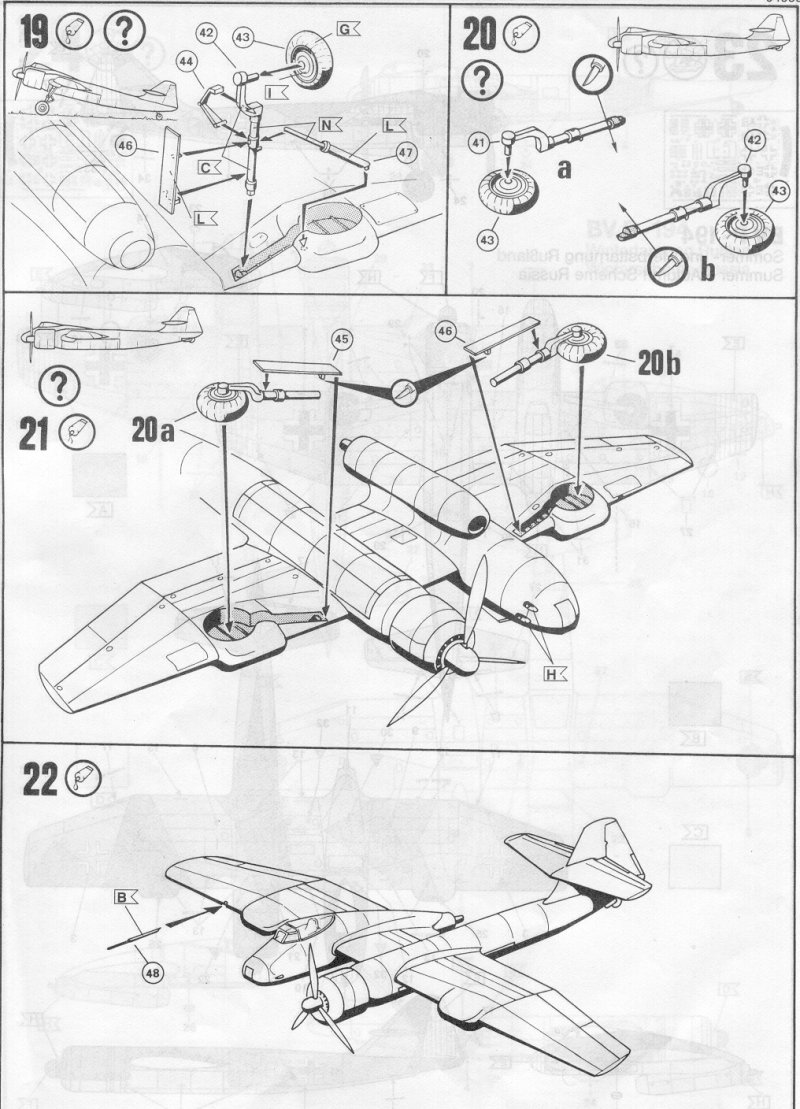
Building the model. The order in which the model can be built is somewhat different from the usual, due to its unusual layout.
It is possible to start by joining the fuselage halves, not forgetting the bomb bay and tailwheel, then adding to it the port and middle section of wing and tailplane.
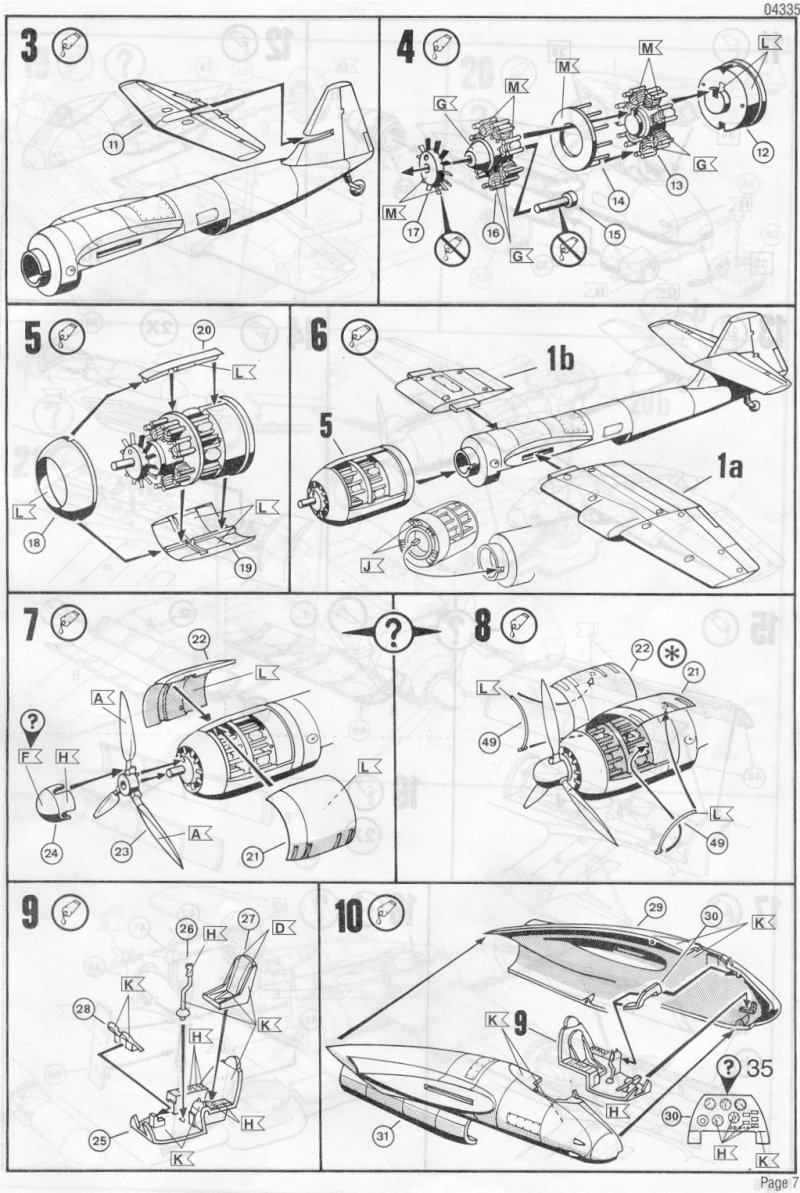
Now the cockpit should be painted and why not also detailed (not much of it is seen, anyway). I painted the cockpit RLM 66 (Humbrol 32) which was the standard for late war cockpits, and highlighted by drybrushing lighter grey. The instrument panel was also highlighted by drybrushing the cleanly moulded details, not using the decal. Painting the straps on the seat is somewhat tricky. Do not forget to paint also the inside of the front of the nacelle - it will be visible from the window in the nose. Generally not much cockpit detail is visible, if you will build the canopy in closed position. (A perfectionist will be a little worried about the fact that if the position and shape of the instrument panel of the real plane was indeed what it is in the kit, the pilot could not see anything through the nose window!)
Now the cockpit can be glued in the nacelle and the nacelle halves joined. The jet engine intake and outlet should be added now. In this phase I checked all the seams of the model, and filled/sanded them where appropriate.
I decided not to display the radial engine, without detailing it would inevitably look dull and unrealistic. (Also, less parts to break off.) I painted the inside of the front part of engine cowlings RLM 02 (Humbrol 92), then built the engine with the propeller and the fan. Be careful to join the prop and the fan, and not the fan and the front cylinder block. The cylinders, fan blades and prop hub were painted Steel (Revell 91), prop blades and spinner RLM 70 (Humbrol 91). The inside of the rear of the engine block was painted RLM 02, and the exhausts Rust (Hu.113) with tiny drops of flat Black (Hu.33) in the middle as openings. The engine and prop forms a sub-assembly that can be later attached to the rest of the aircraft.
The bomb bay and wheel wells were also painted RLM 02, and both SC 250 bombs RLM 70. A perfectionist would add the yellow stripes which were present between the fins of SC bombs.
The bomb bay doors were built in the open position (well, no reason to paint the bomb bay if they were shut), with the required trimming of the inner/lower pair of doors as showed in the instructions.
Rest of the major assembly followed the instructions which were easy to follow. The only note should be that the tailwheel should be fixed in the down position (the position can be corrected when the joint has not yet hardened, if you glue the tailwheel in place when you join the fuselage halves.)
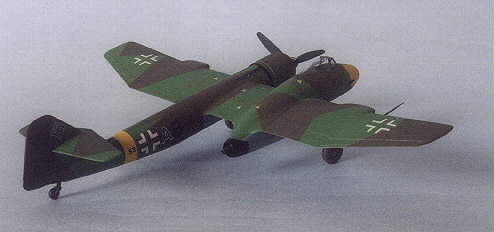
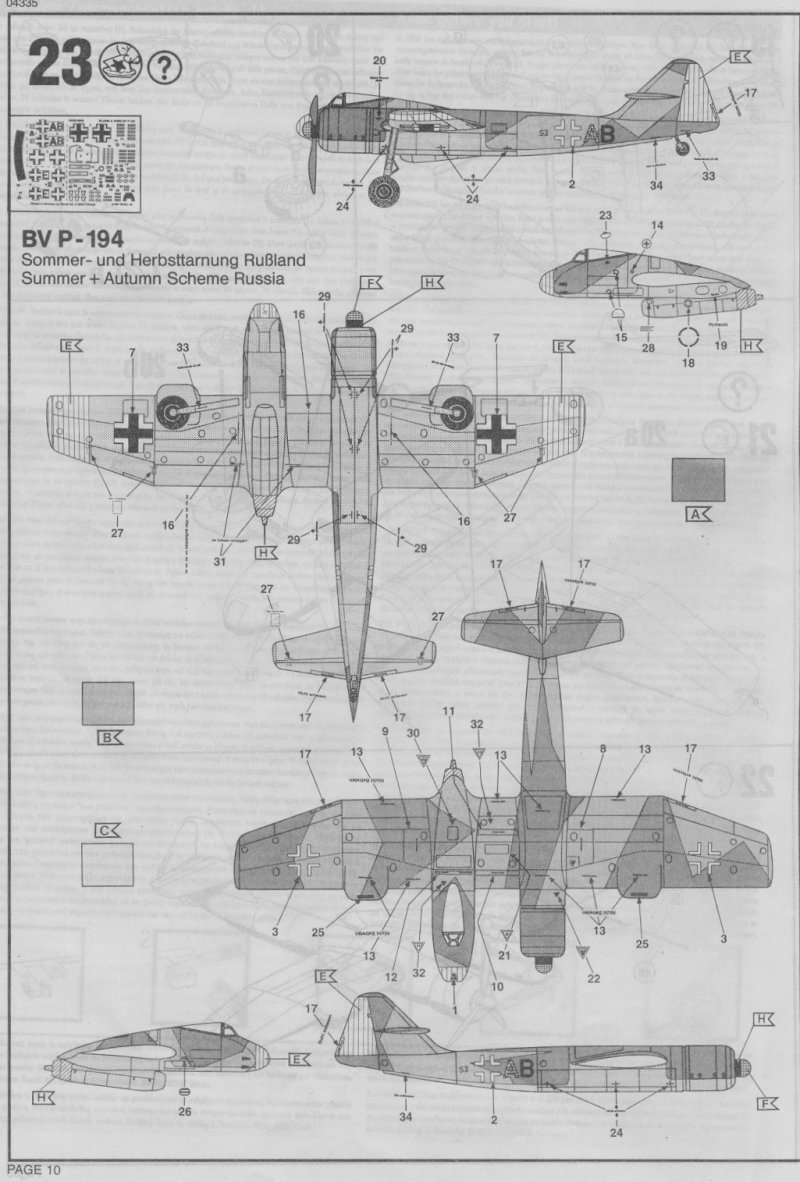
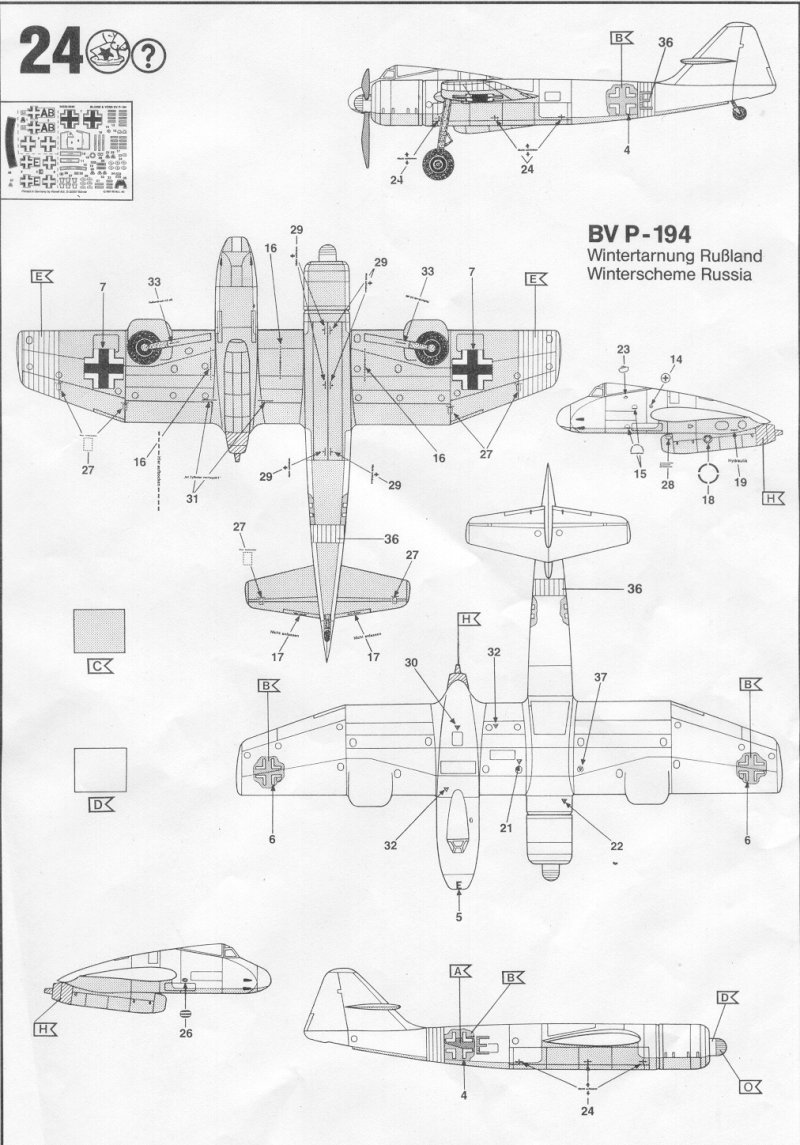
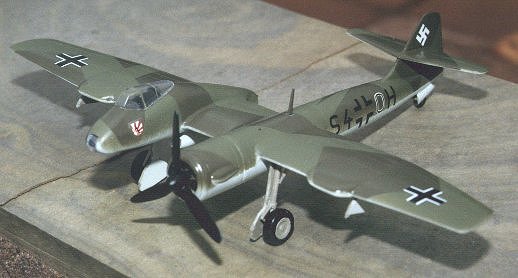
Painting and markings. The painting instructions show two "service" aircraft versions with imaginary camouflage and markings. Both are East Front machines, one in summer camouflage (RLM 70/71/65), the other in winter (21/70/71/65). Probably a 1946 machine would have been painted in later shades, so I decided to give my model a summer splinter camouflage of RLM 81/83/76 (although for a while I thought of the winter camo as well). I used Humbrol paints 155 (RLM 81), 131 (RLM 83 Lichtgrün) and 175 (RLM 76). The nose of the cockpit nacelle and wing tip undersides were painted RLM 04(?) yellow (Humbrol 154 - as this paint is especially tricky, it was applied first). [Unfortunately my precious tinlet of now out of production Huh.175 dried up during painting this model and the Me 262, so from now on I have to achieve RLM 76 with other means.]
The intake of the jet engine was painted Aluminum (Hu.56), the inner part of the outlet and its centre body Gunmetal (Hu.53), and the outer casing of outlet gloss black (Hu.33+Future). Depressions for gun muzzles were painted flat black (Hu.33), and the muzzles themselves were represented with tiny drops of Gunmetal in the rear end of the depressions themselves.
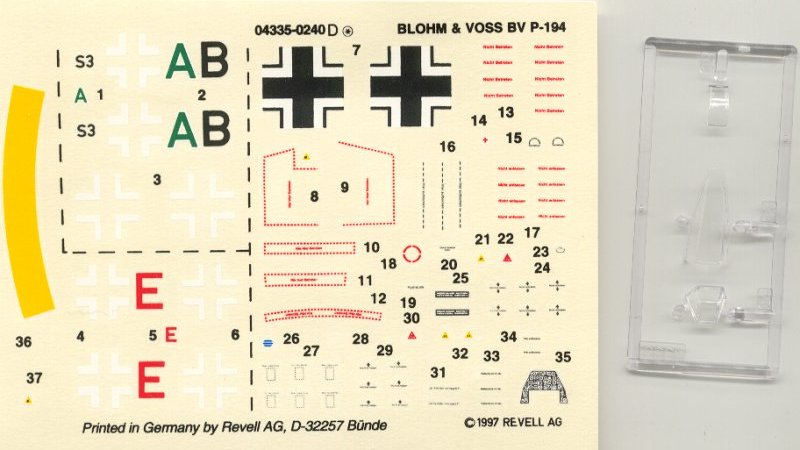
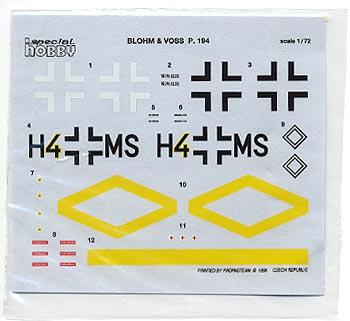
After the paintwork was complete, about three coats of Future acrylic floor "wax" were brushed on the model (where the decals should go) with a Q-tip to avoid running. The decals were good (as it often is for post-1994 Revell kits), though some silvered a little (could be my fault, maybe the base was not smooth enough). As Revell kits always lack swastikas, the missing markings were taken from an Xtradecal aftermarket sheet (white outlines, 300 or 430 scale mm).
The markings were combined from the kit decals for both versions (i.e. the East Front band was taken from the winter version and the code lettering from the summer version). A small Sturminfanterie badge was taken from an old (ESCI) sheet of Hs 129 decals - assuming that the plane was flown as a Schlachtflugzeug (in ground attack role). Initially I also planned to use some kill markings or some Schlachtgruppe insignia from the same sheet, but finally dropped the idea - assuming there was no time to paint the markings in the heat of battles in 1946 ;-) ; and though the plane had four guns, the armament seemed too weak to knock out tanks or ships.
A fancy white spiral was painted on the spinner (Revell 04 Gloss White.)
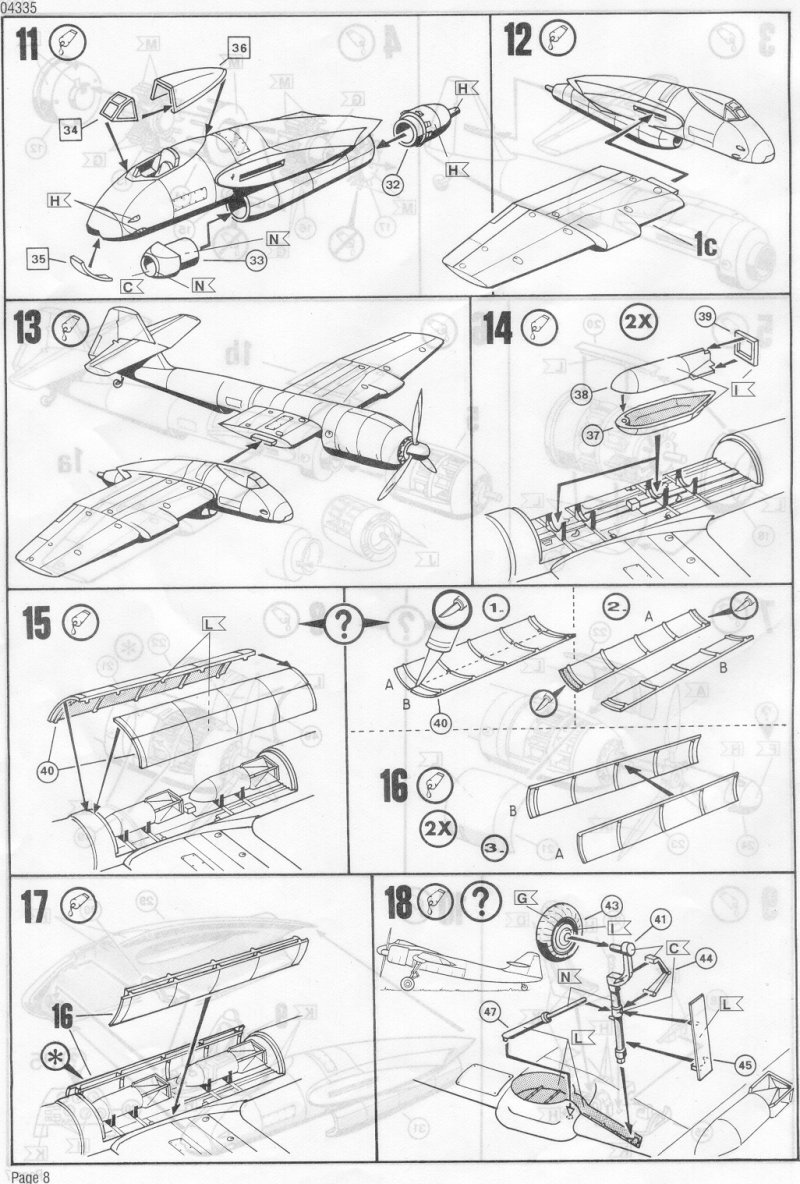
Final assembly and weathering. After the decals were dry and overcoated with more Future, the model was coated with two coats of dullcoat (Humbrol 49; my experiments with Tamiya acrylic flat base X-21 led to nowhere). The main undercarriage was added (struts RLM 02 (Humbrol 92), oleos Silver (Hu.11), tyres Chocolate Brown (Hu.98?), doors RLM 02 and RLM 76). The kit's pitot was fine enough to use (tip Aluminium).
The nose window was glued in position with non-crazing Humbrol Klearfix glue, and the edges of the window painted also yellow as the rest of the nose. A gunsight was scratchbuilt (styrene strip, bit of Future-coated 0.13 mm clear sheet (could be glued with CA glue), tiny drops of silver paint for lens and control knobs) and added to the cockpit. The rest of the canopies were also attached with Klearfix, and the frames painted first with RLM 66 (Hu.32) and then in camouflage colours (RLM 81/83, Hu.155 and Hu.131).
The exhaust and gunpowder stains were painted with flat black (Hu.33) with careful drybrushing with a fine brush, and overdoing the gunpowder stains was successfully avoided. (Often modellers overdo this!) The undersides, especially. near the undercarriage were weathered with drybrushed Burnt Umber watercolour - for overcoming the surface tension of water, I used a decal wettening solution (Humbrol Decal Cote 1) for the medium. Thin oil streaks were painted with the same watercolour on the oleos and near the engine, according to the pattern showed in the book "How to build dioramas" (Kalmbach). Leading edges of prop blades, walk areas of the wing and edges of various hatches were weathered by drybrushing Aluminium.
Final word. An excellent model! It will certainly become an eye-catcher among your models because of its weird shape. (Have I really forgotten to mention that the plane is asymmetric?) It would not be a bad idea to display it with the Bv 141 which had similar layout (the Czech manufacturer Bílek reissued the old Airfix kit of the Bv 141B-02 a few years ago).Now back at Airfix- - as it's Revell this kit should be freely available
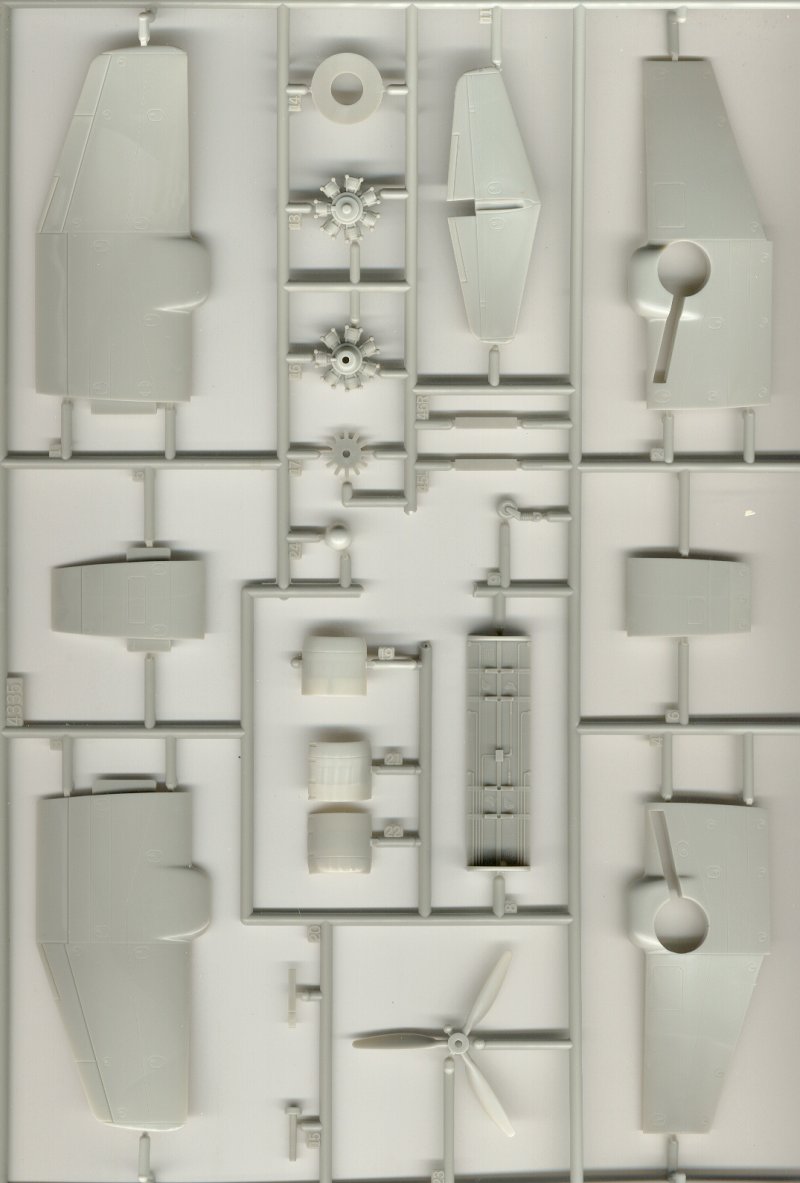
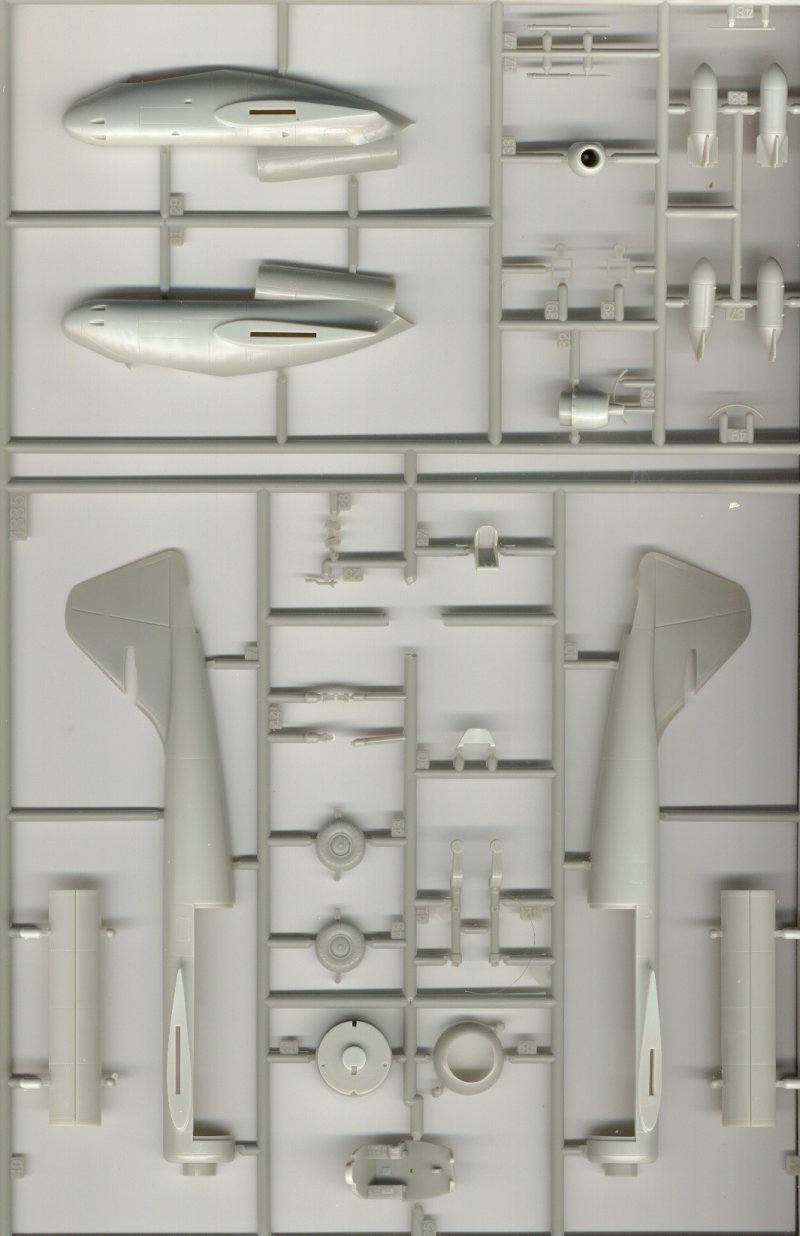
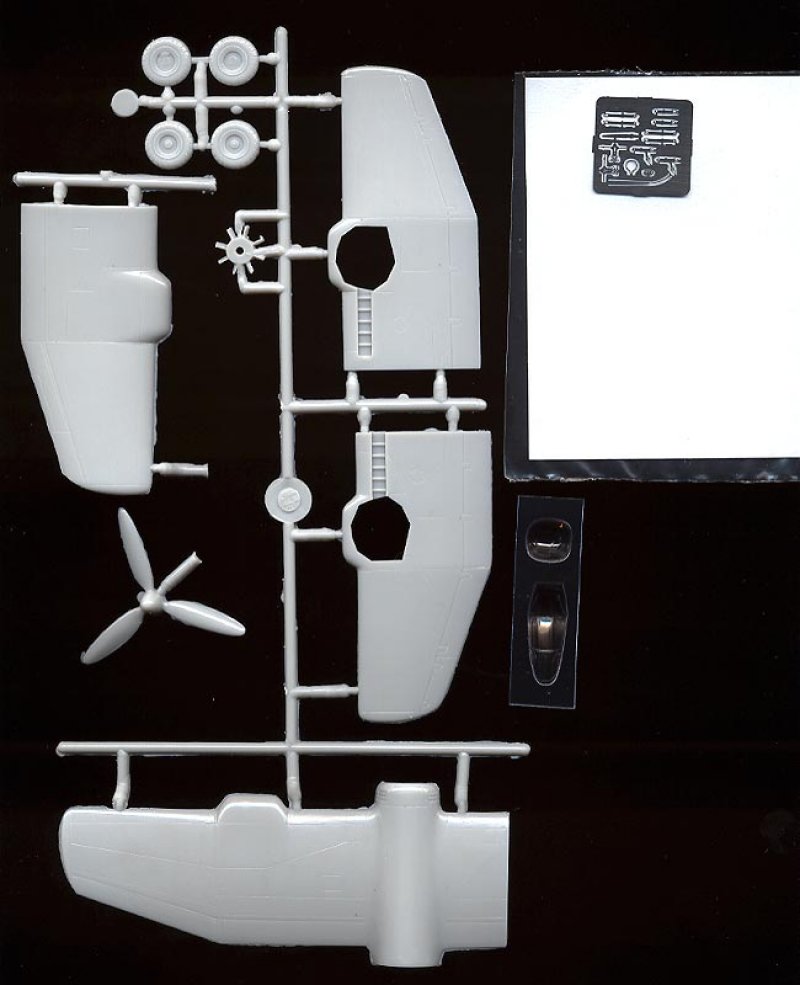
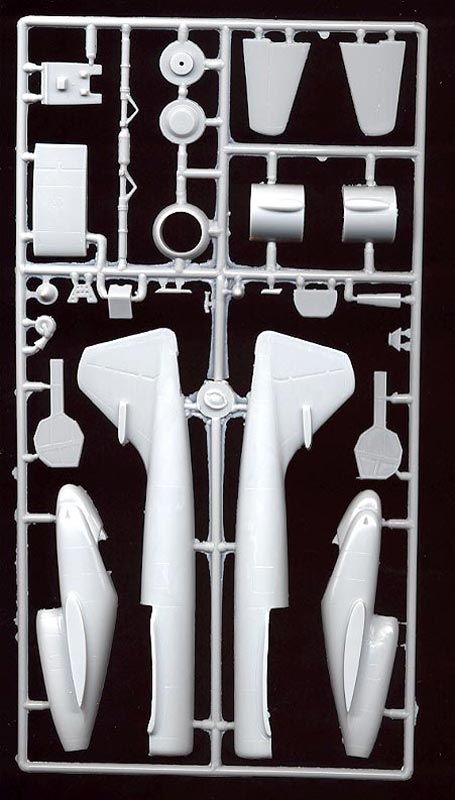
Below are the parts and instrcutions scans for this kit
 |
 |
 |
 |
 |
 |
 |
 |
 |
 |
Czechmaster - Resin - 1/72
John Clarke N.Z.
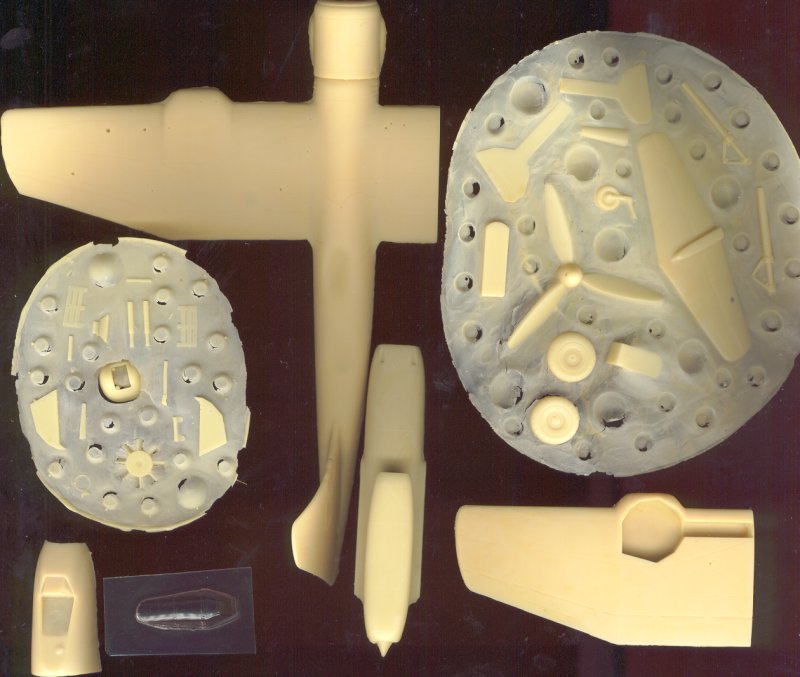
This Resin kit comes in the normal segmented bag, with a A4 instruction sheet, but no data, decals or suggested paint scheme.The main fuselage is a solid lump of resin as are the wings. The kit goes together well with little need for filling. The jet engine lets this otherwise fine kit down, it being moulded in one piece below the cockpit, with no inlet or outlet detail.
As is normal for these low part count kits with large resin parts there is little room for error with only 6 parts plus undercarriage making up the entire aircraft . The surface detail is good with engraved panel lines and no mould or surface holes to worry about.
The kit comes with the normal vacuum formed canopy that fits well.
I finished my model overall in Standard RLM 81 / 82 upper surfaces with RLM 76 undersurfaces, with decals from a Super Scale decal sheet. Below is a scan of my kit which has a few airholes and a bent tail , the latter is I think my fault . Sydney can get hot and I may have left this in the sun one day !
Special Hobby 1/72
Jim Sanderson
The BMW 801 is represented only by a cooling fan that is attached to the sprue at three points; no cylinder heads; the Jumo 004 is also very rudimentary; just a pair of cones inside the cowling. The cockpit includes an instrument panel with recessed gauges, full flooring, amd armored shield and a rear bulkhead; there is a window between the rudder pedals.
With care, an experienced modeler will produce a nice representation.
Scans of the kit are kindly provided below by Felipe Canales.
 |
 |
 |
 |
 |
 |