 |
|
| Manufacturers | |
| BV
List |
|
| BV 40 | BV 141 |
| BV 155 | BV 237 |
| BV P163 | BV P170 |
| BV P178 | BV P179 |
| BV P184 | BV P188 |
| BV P192 | BV P193 |
| BV P194 | BV P196 |
| BV P197 | BV P198 |
| BV P202 | BV P203 |
| BV P204 | BV P205 |
| BV P207 | BV P208 |
| BV P209 | BV P210 |
| BV P211 | BV P212 |
| BV P213 | BV P215 |
| BV AE607 | BV MGRP |
| Home | |
Airmodel $ 40 AUD June '97
One piece for the main body and one for the wings and top of the fuselage make this a quick kit. Another 15 parts are supplied for the nose , u/c and cockpit interior. Interestingly the instructions are classic Czechmaster style leading me to believe the connection between the 2 companies goes back at least 5 years rather than just recently as believed previously. It's definitely a quick build and looks like a smaller version of their BV P 215 which could have been a 2 seat night fighter.
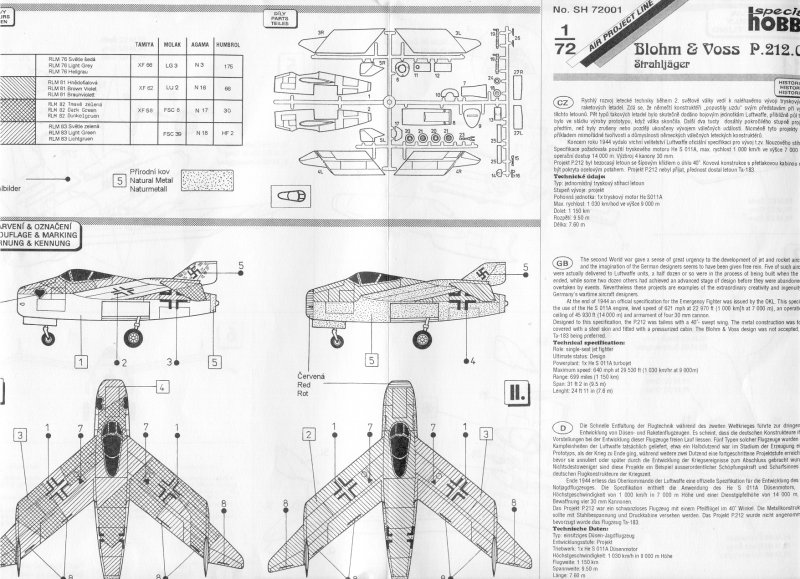
I did have this kit at one stage but currently can't lay my hands on it to do a scan , for most people it's purely academic as this kit is probably unobtainable as of 2000 with the dissapearance of their kits recently . Try AvUsk or Hannants maybe.Special Hobby 1/72
Mark Hernandez and Ed Bailey
 |
 |
 |
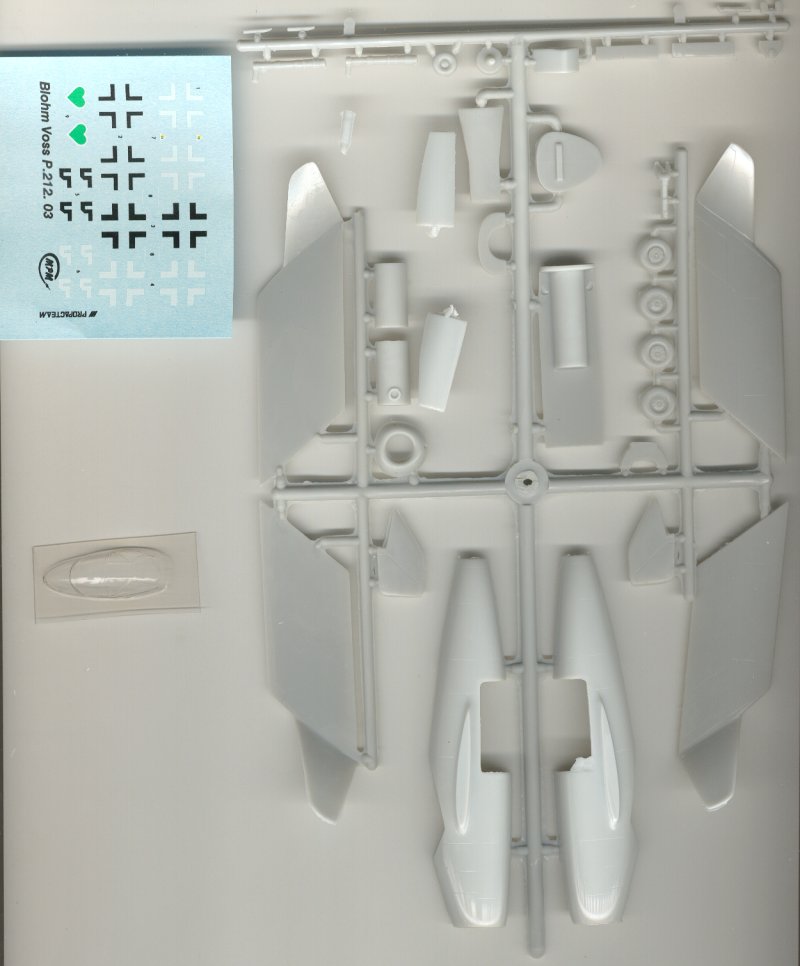 |
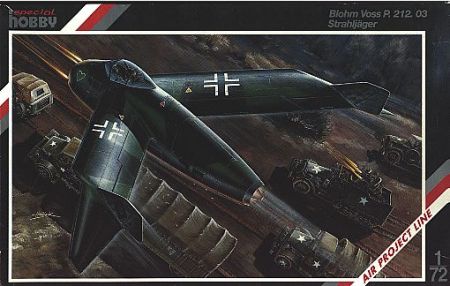
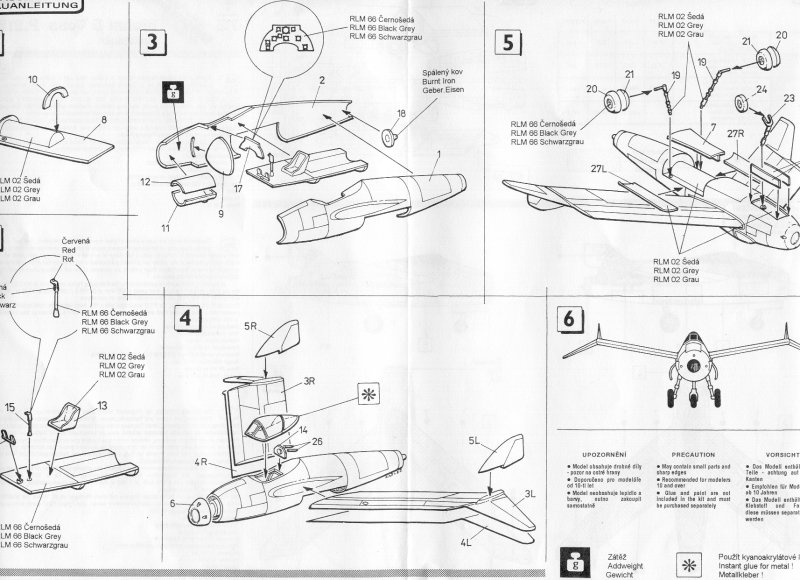
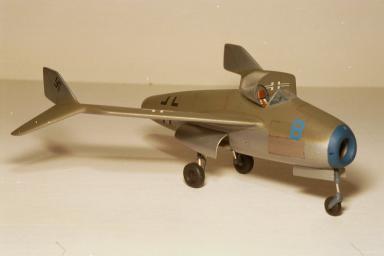
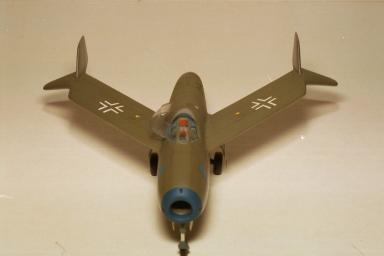
This kit is moulded in light grey plastic and about 36 pieces. The canopy is vacuform and the decals seem decent. This is pretty typical for Special Hobby (SH) kits. This was a concept plane for a tailless 40 degree swept wing single seat fighter. It had tip sails on the outer wings that incorporated the rudders and additional angled down wing tips beyond incorporating the balance of the ailerons. Kind of looks like a modern day Burt Rutan design.
The kit has engraved panel lines but the trailing edges of the wings are thick and will need a lot of sanding to get a sharp trailing edge. Again, this is typical for SH kits. There are no locating holes or tabs for the body or wings. Again, same as above.
I wanted to give depth to the engine intake so I cut off the cockpit floor, which is molded to the wheel well assembly and part of the intake tube, and made my own out of styrene tubing. There is a front bulkhead that the intake tube butts up against. I made a new bulkhead and drilled the hole to accept the new intake tube. I had to fashion a new rear bulkhead because there is none provided with the kit. I made the front of the jet engine our of a a piece of sheet styrene and painted a false image of the blades on it and glued it to the back end of the intake tube. Looks pretty good when you shine a flashlight down it, and NO SEAMS!
The cockpit is too low so I moved it up. With the new intake tube the cockpit floor sits atop of it. I scratch built the entire interior stealing ideas from the Me 262, He 162 and Me P.1101 instrument panels and side consoles. I scratch built the ejection seat based on the He 162 and added seatbelts from Airwaves. I used the gun sight from Copper Details Me 262 kit. The exhaust cone given was too shallow so I made my own out of styrene tubing sanded to the correct size. I added a lot of weight to the nose. I have some moldable lead leads I found in the railroad section. They are great! Once everything was aligned I glued it all together. The rear of the plane is not quite round enough so when everything went together there was a gap to fill. Since I used a strip of styrene as a locator tab inside it was easy to fill and sand the gap with CA. After all was sanded I drilled out the 3 cannons in the nose.
The wings are in upper and lower halves and as I have mentioned earlier will need a lot of sanding to get a good trailing edge. The tip sails are one piece but don't fit or align very well on the wing. A lot of trial sanding and fitting is going to be needed, and oh yes, gap filling super glue.
There are no attachment points for the wings. If you just butt them up to the fuselage there is very little dihedral. From the drawings the dihedral looks to be 10 degrees. I built a jig to hold the A/C and align the wings. I drilled out a locater hole on each side and inserted a steel rod for attachment and strength. More gap filling CA and rescribing.
Next was the landing gear. It's not quite round so I scratch built it out of brass and aluminum tubing. I used bare metal foil to simulate to oleo struts and black wire for the brake lines. I used the front and side view drawings to gauge the correct attachment angles. The same went for the nose gear for scratch building except I moved the gear to the front of the bay instead of the back where the kit shows it. In front seems more logical because of the room to rotate the nose wheel would have been greater in a rearward retracting system then in a forward retracting one once the nose wheel rotated 90 degrees or straight back. I put all the gear on after I painted it. I also built my own gear doors for scale thickness and curved them over another piece of tubing.
Last bit of attachment was the canopy. I HATE SH vac canopies. They are not the clearest and are thick and hard to cut and the frames are sometimes not easily defined. I coated the inside with Future to prevent fogging when I glued it on. I'm speaking from past experience without the Future coating. I was going to leave it in the closed position but since I didn't cut it out right I ended up cutting it open to display the cockpit interior. I covered the canopy with bare metal foil and cut out the frames with a brand new Xacto. I used the new Testors glue for clear parts and it seems to work very good. Since I was going to open the canopy I decided I'd need a thick piece of plastic for the armored windshield. I was at a lost to find something that thick. Then I found an old Tic Tac plastic case. The kind with a thick clear plastic top. It was the perfect thickness.
I painted the undersurface with Xtracolor oily steel. Someone told me this looks like German type steel. I mixed some brown into it and proceeded to darken a few panels. The top part was all RLM 81, similar to late war JV44 Me 262s. I made it a faded 81 and looked more olive drab then brown, but this is LW46, who can argue. I sprayed Future over all, applied the decals from various after market sets and added fuel triangles and various other decals from an Me 262 set including hand and foot sets. The nose is blue with a blue 8 on it. I did a little weathering and then Dullcoated the RLM 81. I used a Post-It pad as a barrier between the shiny steel and the weathered RLM 81.
Here's Mark's completed kit:
|
|
|
This being one of my first Czech kits, it was a real learning experience. Everything fits well. Internal parts required only a little sanding to fit between the fuselage halves. Amazingly, the panel lines on the fuselage halves match up perfectly! The solid two-piece wings have no tabs to support them in the fuselage. This was actually an opportunity to set the dihedral at the right angle. I drilled out holes for brass tubing to support the wings in the fuselage, and packed epoxy putty inside the fuselage halves. This way I could carefully set the dihedral angle before the epoxy putty dried.
The next day, I easily pulled both wings out and superglued them back in, forming a joint that will withstand rough handling.
Detail is good, with fine engraved panel lines. Trailing edges of the wings are 'way too thick, so I sanded the inside faces of the wing halves before gluing them together. The landing gear struts are usable, but the blobby two-piece wheels needed replacement. At first, the separately molded nose didn't look like it would fit (it looks like a 1/35 toilet seat), but it fit perfectly. The cockpit is spacious and calls for some creative detailing. I added side consoles, a gunsight, and scratchbuilt a seat matching the He 162's.The generic German photoetched detail set (harness, rudder pedals, antennas) is included, and a vacuform canopy. The canopy is pretty badly striated (you can stretch-form better), so I tried sanding, polishing and coating with Future floor polish. The result is a little better. I haven't put on the decals yet. They're thin, and I'll have to be careful with them.
The finished kit scales accurately to data in Geheimprojekte der Luftwaffe, though the dorsal curve of the fuselage looks more generous in GdL. Those who want a more accurate model might want to rework the inlet duct where it passes through the main gear bay. I contented myself with some cockpit and landing gear detailing.